
Installing an STI Top Mount Intercooler (TMIC) in a WRX
You can easily install the upgraded STI
top-mount intercooler in your garage using basic tools.
This procedure was documented on a stock 2004 WRX.
Follow these steps:
1. Disconnect your battery and make sure you have all the necessary tools. You need a flat bladed screwdriver, a 10mm wrench, and a 12mm wrench. Consider the picture before you in the engine compartment. The parts you’re looking for are centered on top of the engine. You need the new intercooler, an STI Y-pipe and inlet elbow and a new gasket for the bypass or blow-off valve. You also need the STI air conditioning line bracket for the firewall.
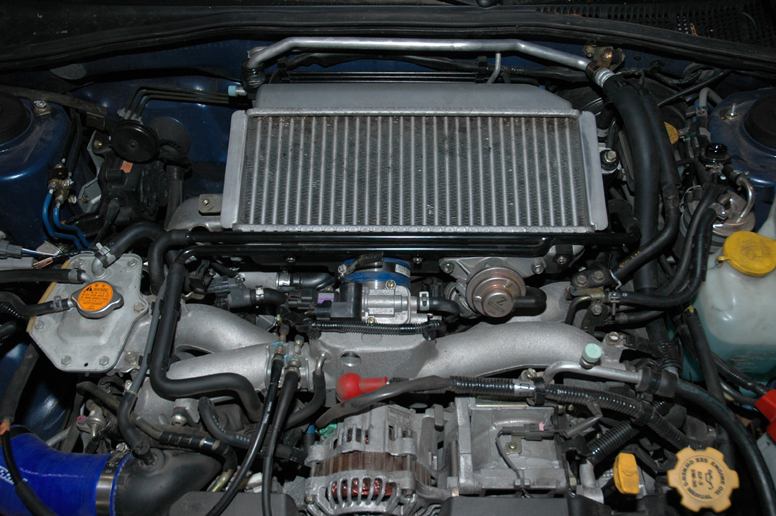
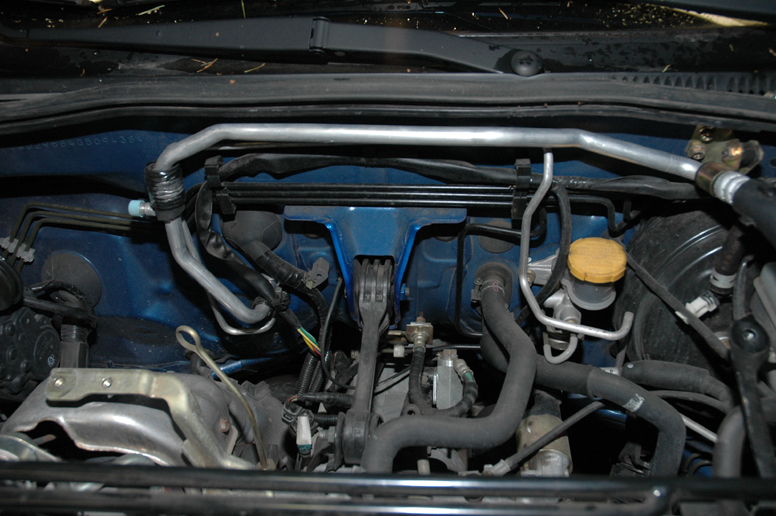
This is the stock WRX engine with the stock intercooler on top.
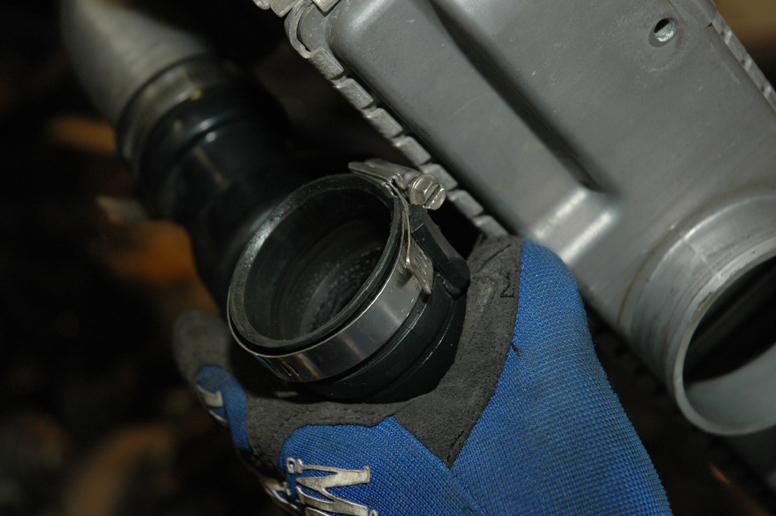
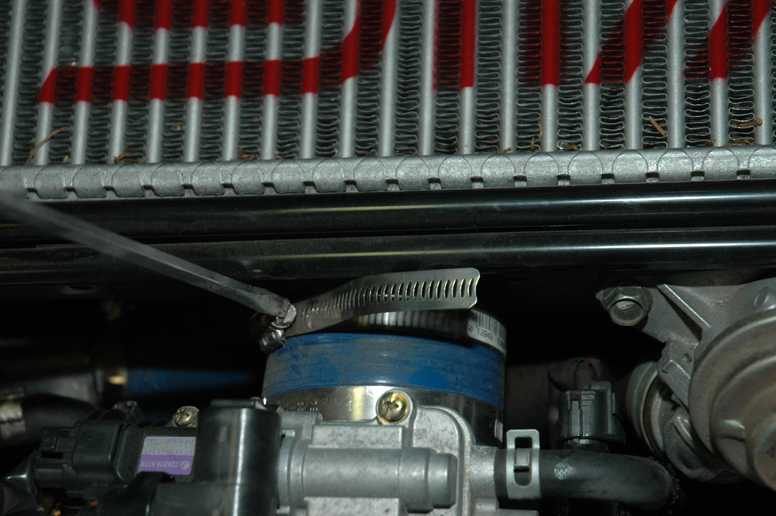
2. Two 12mm bolts that hold the intercooler to its mounting bracket on either side of the cooler. On the passenger side, note that there’s an open hole in the bracket—this hole is there to accommodate the STI intercooler. Three 10mm bolts hold a metal tube to the front of the intercooler, and two 12mm bolts that attach the bypass valve. Underneath the intercooler on the passenger side, there’s a hose clamp that holds the Y-pipe to the turbo, and there's another hose clamp in front that holds the intercooler to the throttle body.
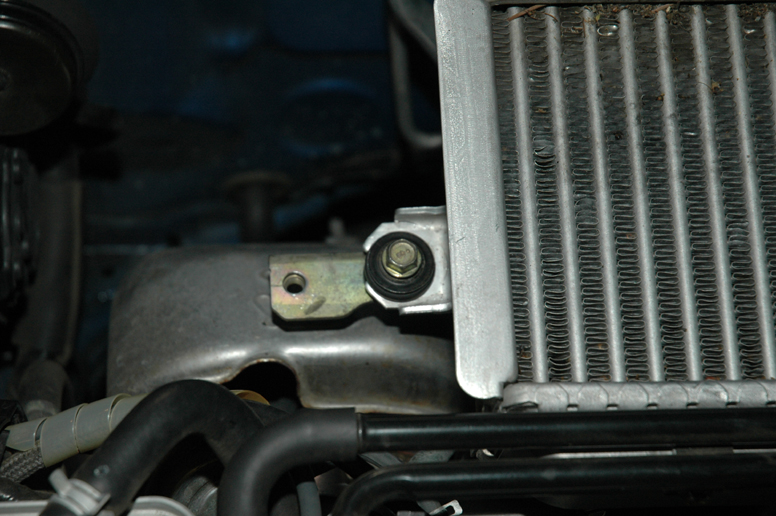
Note the extra bolt-hole Subaru thoughtfully placed in just the right spot for an STI intercooler.
You need to undo all these bolts along the front of the intercooler.
3. Loosen the hose clamps first (and hopefully the one under the intercooler is oriented to make this easy) and then undo all the bolts. The intercooler should lift out and take the Y-pipe with it. Leave the bypass valve on the intake manifold—you don’t need to totally disconnect it. You might need to wiggle it loose, but don’t pull too hard.
Carefully lift out the intercooler and the hoses should come free if you’ve loosened the clamps.
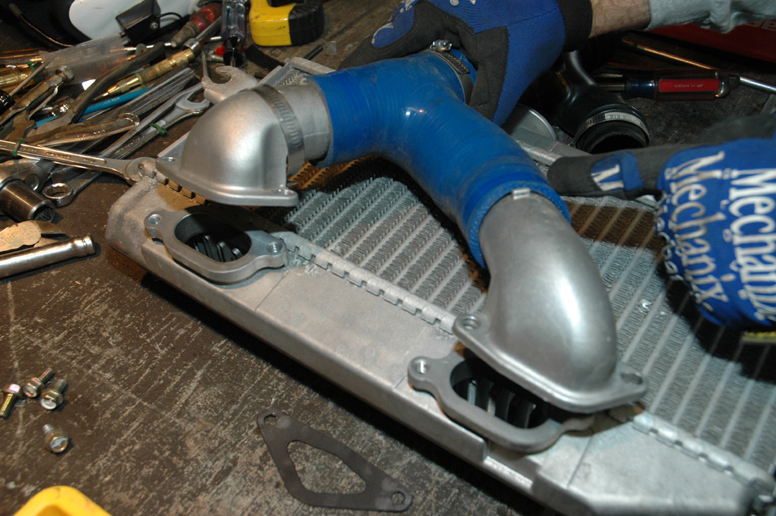
4. Turn the intercooler over and have a look at the stock Y-pipe. It’s made of plastic and has lots of bumps and wiggles—not a smooth flow! But note that on the turbo end, there’s a tab to keep the hose clamp in the right position for easy installation and removal. You won’t have that on an aftermarket silicone Y-pipe, and you’ll want to be careful about that.

The stock Y-pipe is made of plastic, and not a very smooth flow.
This tab keeps the hose clamp in proper orientation for easy access.
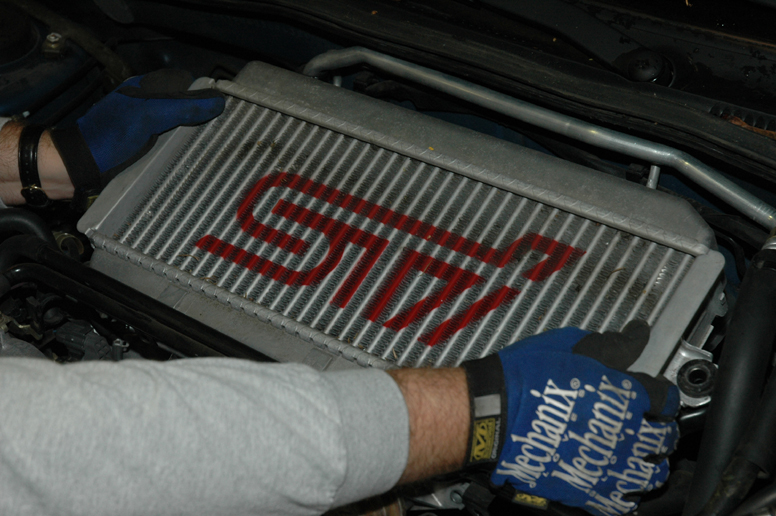
5. With the old intercooler out of the car, you can compare the WRX and STI parts. The STI part is wider, deeper, and a little taller.
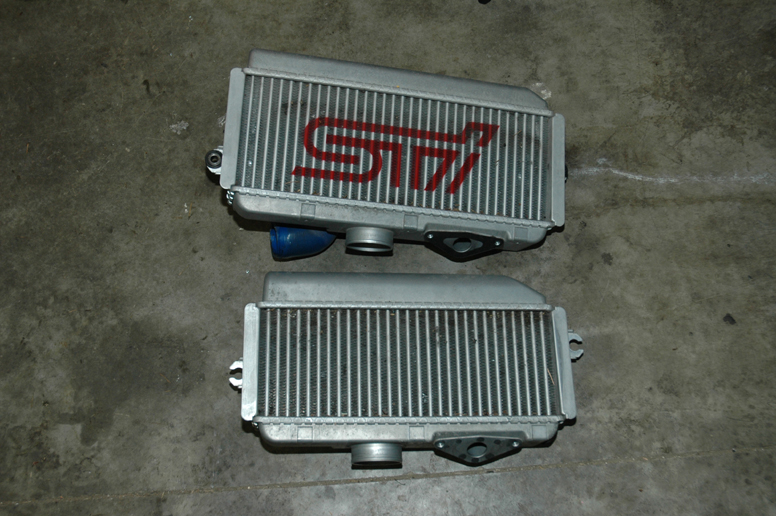
The STI intercooler is larger in every dimension than the stock WRX unit.
6. Install the metal STI Y-pipe and the inlet elbow on the STI intercooler and tighten the hose clamp on the inlet elbow. The Y-pipe installs in one orientation only. You can re-use the stock WRX inlets if your STI intercooler does not have the STI Y-pipe installed. You need a new pair of inlet gaskets and you need to modify a WRX flexible Y-pipe with an extension if you do. It’s better to get the STI Y-pipe, however.
If you need to use your WRX intercooler inlets, they fit right on to the STI intercooler.
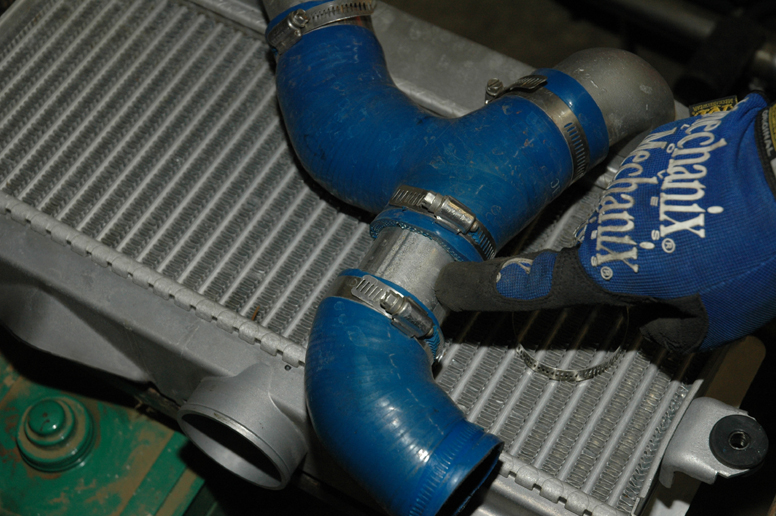
This is an adapted WRX Y-pipe. It’s cut in the middle and a length of exhaust tubing installed. This is not the preferred method, but it works.
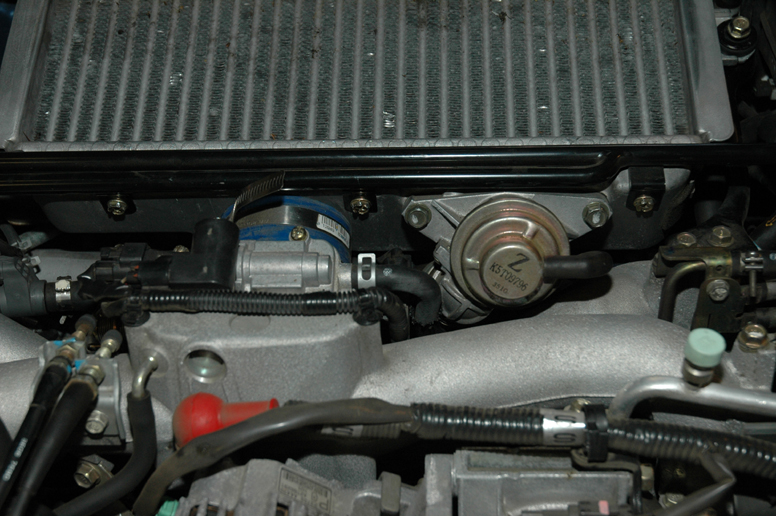
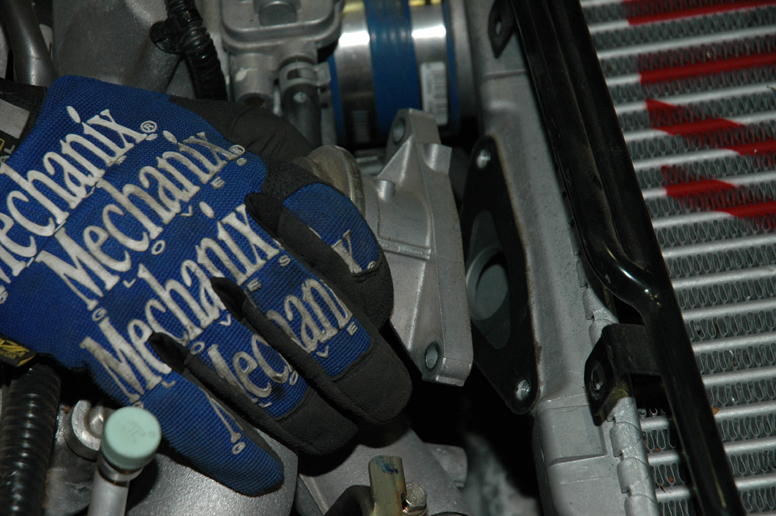
7. This step is tricky and dangerous. The larger intercooler you’re installing interferes with the air conditioning line that runs up near your car’s firewall. This line needs to be bent a little to keep it clear of the STI part. You can have a Subaru dealer or an experienced shop do this, or you can try it yourself, but be very careful not to kink the line or your air conditioning won’t work. Install the STI bracket to hold it in place.
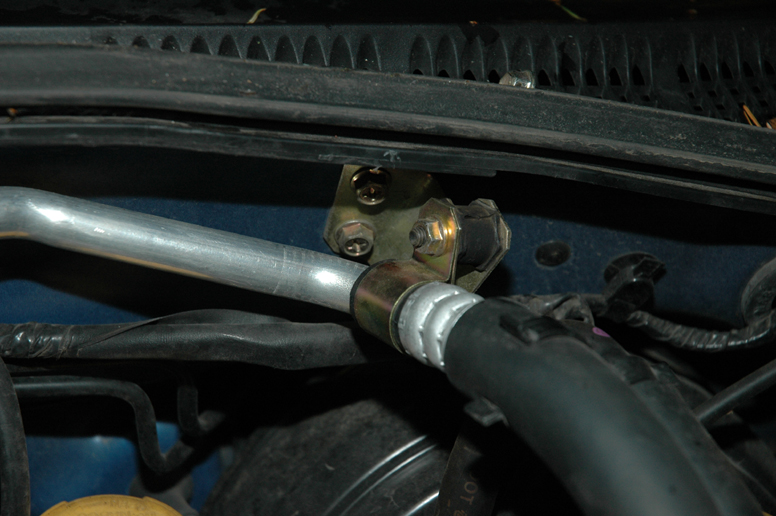
This STI bracket keeps your AC lines from rubbing the intercooler.
The lines have to be bent in several places to clear the intercooler. We had a Subaru shop do it.
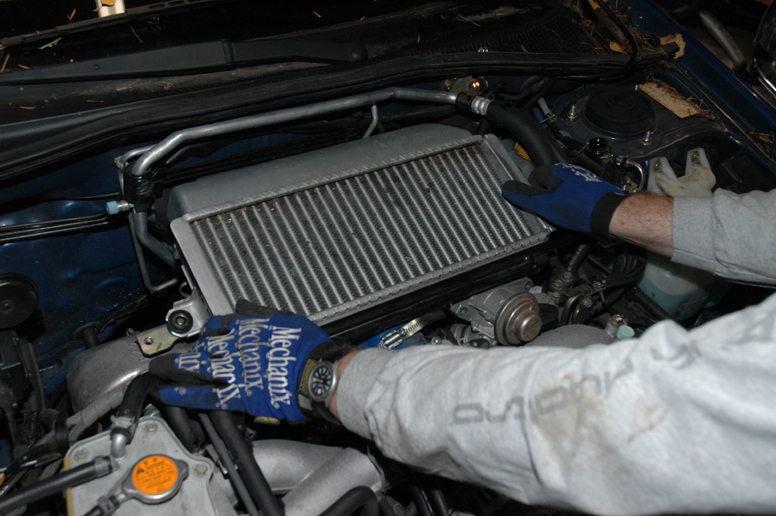
8. Place the STI intercooler in its place, making sure that the AC lines clear the part, or the intercooler will wear a hole in the lines. Carefully fit the Y-pipe to the turbo and the intercooler output to the short throttle body hose, and tighten the hose clamps. Place the turbo clamp in a good orientation so that you can remove it again later.
Carefully place the new intercooler in position and work the hoses onto their flanges.
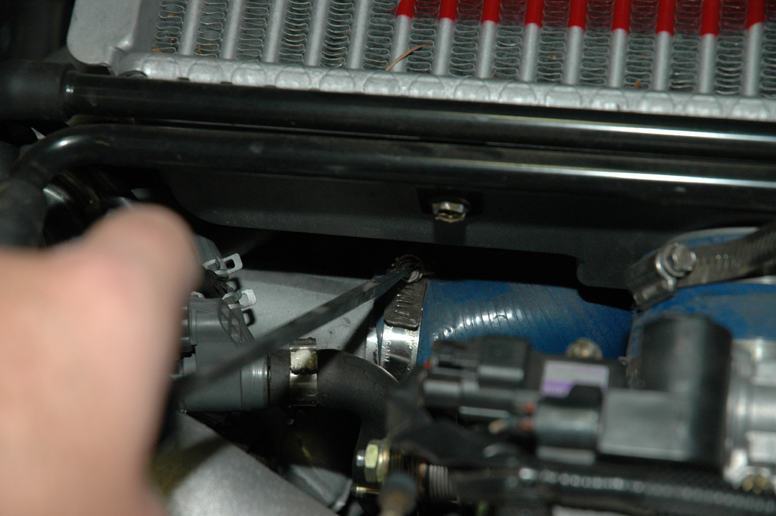
Keep the hose clamp oriented so that the adjustment head points out from under the intercooler. This way you’ll be able to remove it easily later.
The joints between the components can leak pressure if they’re not right, so make sure you get these connections on straight and snug.
9. Install the mounting bolts and re-bolt the metal tube to the front of the intercooler. Replace the bypass valve with the new gasket and bolt it to the intercooler.
Be sure to use a new gasket when reinstalling your bypass valve, or you’ll get a pressure leak.
Reattach the metal tubes to the new intercooler.
Tighten down the main bolts and you’re done.
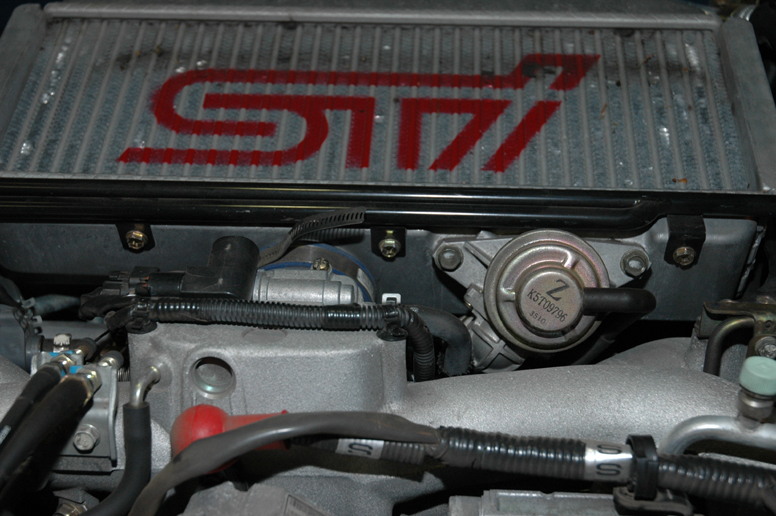
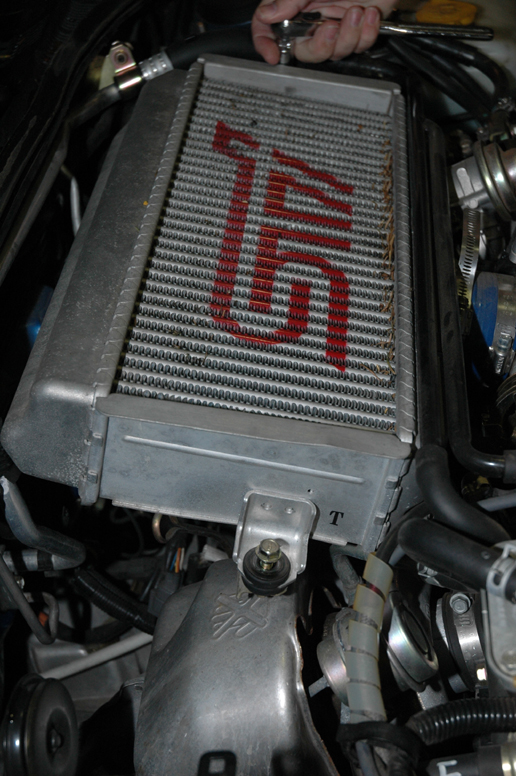
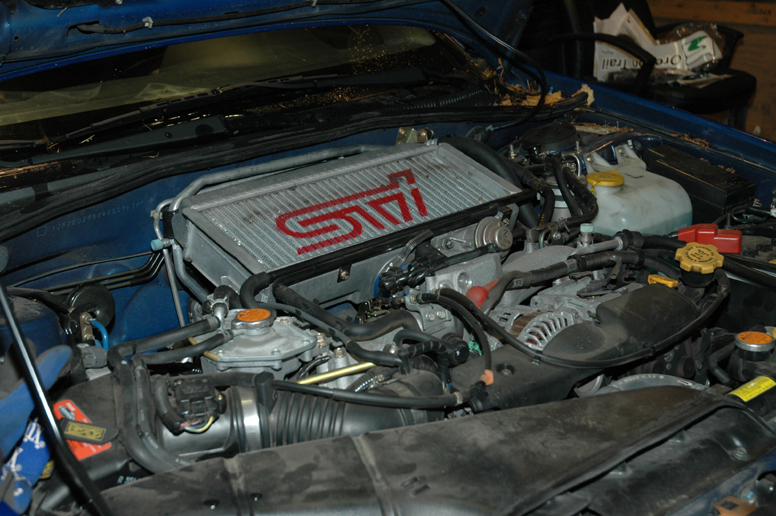
10. Your finished installation should fit snugly under the hood, and you should hear no pressure leaks from the pipes. You can spray a little Windex on the tube joints to check for bubbles when the car is running. Your new intercooler should clear the air conditioning lines without touching. And you get the snappy STI logo to please your eye and impress your friends every time you open the hood.
Check for pressure leaks by spraying a bit of Windex around the joints with the engine running and a little bit of boost built up. You’ll see bubbles if there’s a problem.
1. Disconnect your battery and make sure you have all the necessary tools. You need a flat bladed screwdriver, a 10mm wrench, and a 12mm wrench. Consider the picture before you in the engine compartment. The parts you’re looking for are centered on top of the engine. You need the new intercooler, an STI Y-pipe and inlet elbow and a new gasket for the bypass or blow-off valve. You also need the STI air conditioning line bracket for the firewall.
This is the stock WRX engine with the stock intercooler on top.
2. Two 12mm bolts that hold the intercooler to its mounting bracket on either side of the cooler. On the passenger side, note that there’s an open hole in the bracket—this hole is there to accommodate the STI intercooler. Three 10mm bolts hold a metal tube to the front of the intercooler, and two 12mm bolts that attach the bypass valve. Underneath the intercooler on the passenger side, there’s a hose clamp that holds the Y-pipe to the turbo, and there's another hose clamp in front that holds the intercooler to the throttle body.
Note the extra bolt-hole Subaru thoughtfully placed in just the right spot for an STI intercooler.
You need to undo all these bolts along the front of the intercooler.
3. Loosen the hose clamps first (and hopefully the one under the intercooler is oriented to make this easy) and then undo all the bolts. The intercooler should lift out and take the Y-pipe with it. Leave the bypass valve on the intake manifold—you don’t need to totally disconnect it. You might need to wiggle it loose, but don’t pull too hard.
Carefully lift out the intercooler and the hoses should come free if you’ve loosened the clamps.
4. Turn the intercooler over and have a look at the stock Y-pipe. It’s made of plastic and has lots of bumps and wiggles—not a smooth flow! But note that on the turbo end, there’s a tab to keep the hose clamp in the right position for easy installation and removal. You won’t have that on an aftermarket silicone Y-pipe, and you’ll want to be careful about that.
The stock Y-pipe is made of plastic, and not a very smooth flow.
This tab keeps the hose clamp in proper orientation for easy access.
5. With the old intercooler out of the car, you can compare the WRX and STI parts. The STI part is wider, deeper, and a little taller.
The STI intercooler is larger in every dimension than the stock WRX unit.
6. Install the metal STI Y-pipe and the inlet elbow on the STI intercooler and tighten the hose clamp on the inlet elbow. The Y-pipe installs in one orientation only. You can re-use the stock WRX inlets if your STI intercooler does not have the STI Y-pipe installed. You need a new pair of inlet gaskets and you need to modify a WRX flexible Y-pipe with an extension if you do. It’s better to get the STI Y-pipe, however.
If you need to use your WRX intercooler inlets, they fit right on to the STI intercooler.
This is an adapted WRX Y-pipe. It’s cut in the middle and a length of exhaust tubing installed. This is not the preferred method, but it works.
7. This step is tricky and dangerous. The larger intercooler you’re installing interferes with the air conditioning line that runs up near your car’s firewall. This line needs to be bent a little to keep it clear of the STI part. You can have a Subaru dealer or an experienced shop do this, or you can try it yourself, but be very careful not to kink the line or your air conditioning won’t work. Install the STI bracket to hold it in place.
This STI bracket keeps your AC lines from rubbing the intercooler.
The lines have to be bent in several places to clear the intercooler. We had a Subaru shop do it.
8. Place the STI intercooler in its place, making sure that the AC lines clear the part, or the intercooler will wear a hole in the lines. Carefully fit the Y-pipe to the turbo and the intercooler output to the short throttle body hose, and tighten the hose clamps. Place the turbo clamp in a good orientation so that you can remove it again later.
Carefully place the new intercooler in position and work the hoses onto their flanges.
Keep the hose clamp oriented so that the adjustment head points out from under the intercooler. This way you’ll be able to remove it easily later.
The joints between the components can leak pressure if they’re not right, so make sure you get these connections on straight and snug.
9. Install the mounting bolts and re-bolt the metal tube to the front of the intercooler. Replace the bypass valve with the new gasket and bolt it to the intercooler.
Be sure to use a new gasket when reinstalling your bypass valve, or you’ll get a pressure leak.
Reattach the metal tubes to the new intercooler.
Tighten down the main bolts and you’re done.
10. Your finished installation should fit snugly under the hood, and you should hear no pressure leaks from the pipes. You can spray a little Windex on the tube joints to check for bubbles when the car is running. Your new intercooler should clear the air conditioning lines without touching. And you get the snappy STI logo to please your eye and impress your friends every time you open the hood.
Check for pressure leaks by spraying a bit of Windex around the joints with the engine running and a little bit of boost built up. You’ll see bubbles if there’s a problem.