
Regreasing Stock WRX Struts
Disclaimer: I am
not responsible for any personal or property damage and
no warranty is implied.

Not going to go into the details or theories about what strut clunk is. There is some useful info mixed in with this thread on what strut clunk is.
This is my how to on what I believe is the most obvious cause of strut clunk. From what I have seen, strut clunk is caused by accelerated wear of strut components and the seizing of the rear struts as the rear end goes through its motions. It appears that this is all due to a lack of proper lubricant/lubrication from the factory. I also believe that suspension geometry plays a role. We can't change the latter so lets focus on what we can fix or at least do to attempt to prolong the life of the struts.
There are what I like to call grease reservoirs in the strut housings. They are channels that run the radius of the strut housing that are supposed to be full of grease. In every GD STi front and rear strut I have pulled apart, regardless of mileage, there is little and in some cases almost no grease in the reservoirs from the factory. We will be repacking these reservoirs with new grease so that the struts have proper lubrication and continue to function properly.
The assumption is that you already know how to pull the struts of the car. I would say that this process is just as difficult as pulling the struts off. Maybe slightly less so.
This How-To works for any year Impreza up to 2007 and applies to the front struts as well. Any McPherson inverted strut really. The only difference being that you will definitely need spring compressors to disassemble the front struts and most likely the rear struts on some other models (definitely not the GD STi). Mind your fingers.
This How-To could be handy if you're swapping out/cutting bump stops as well.
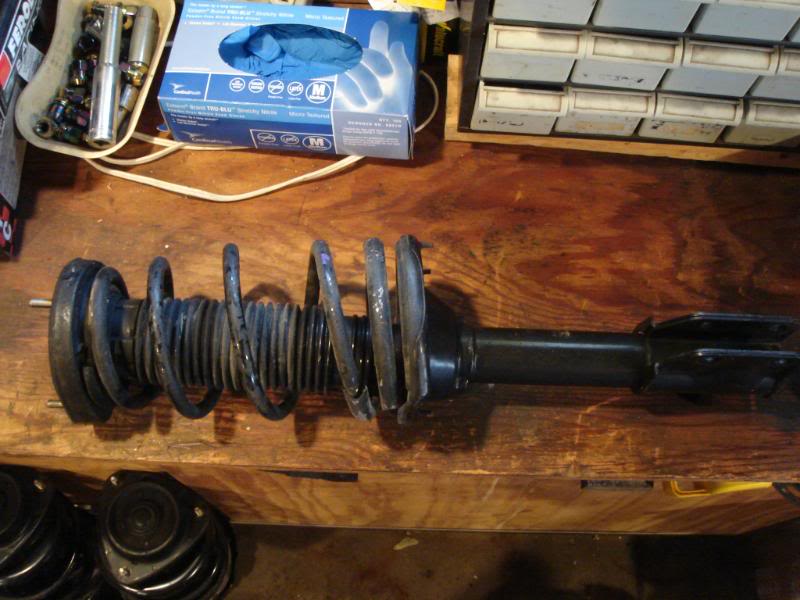
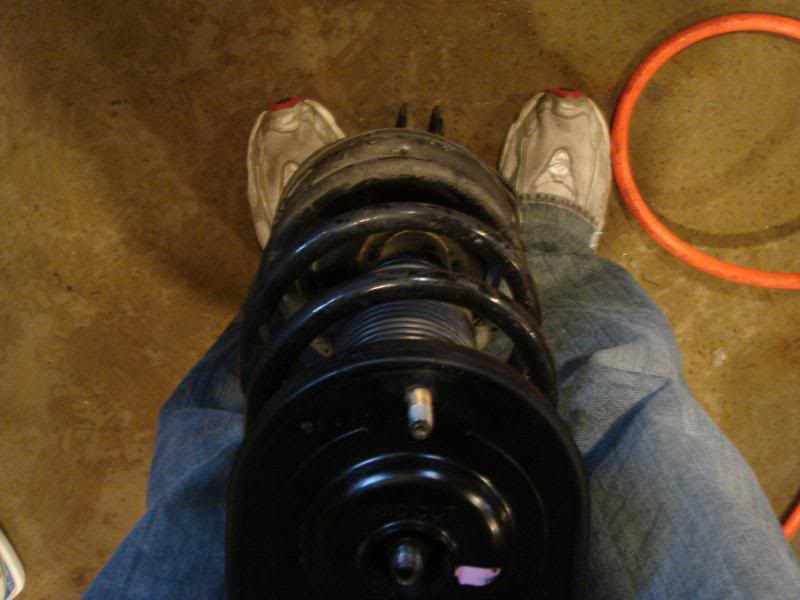
Here is the rear strut assembly as it sits off the car:
The "nice" thing about the GD STi rear struts is they don't have much spring preload on them. It's really only nice because it makes it possible to pull the rear struts apart without using spring compressors. I recommend having a second set of hands but it can be done by yourself as I have. If I had to make an educated guess, I would say there is about 20lbs on spring preload and a load of only double that needs to be applied to get the strut to compress enough to remove the upper strut mount nut. I'm not suggesting you can be careless and not get hurt but only that applying some force to the top of the strut compresses the spring more than enough to safely remove the nut that holds the spring/strut/upper strut mount assembly together.
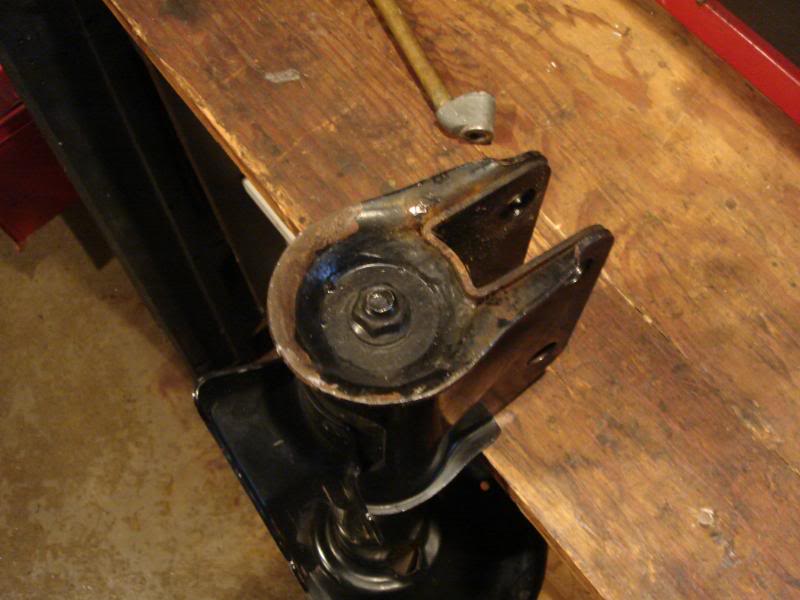
First, we need to remove the nut holds the spring/strut/upper strut mount assembly together. Shown here:
There are two ways to do this. The "proper" way is to use a Subaru strut mount socket or a through ratchet and a hex bit socket. This will require a second set of hands. The other way is to use an impact gun and just zip the socket off. It's really the only way to do it if you're alone and don't have spring compressors and is generally quicker. I've had success with both the "proper" and the impact gun method. Just don't over torque the upper strut mount nut upon reassembly.
Turn the strut assembly so it is upright as if it were attached to the car. Set the strut on a hard surface (ie concrete) and apply enough load to compress the spring slightly. Remove the upper strut mount nut (17mm nut). Again, there isn't much preload on the spring so it will not shoot off. You will then be able to remove the strut top hat and the spring.
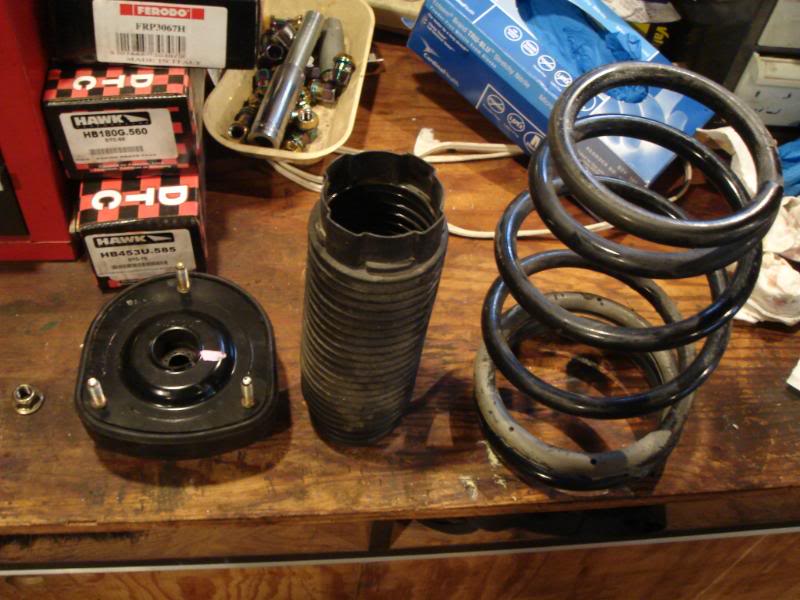
Disassembled pieces (you don't have to separate the dust shield from the top hat, done for illustrative purposes):
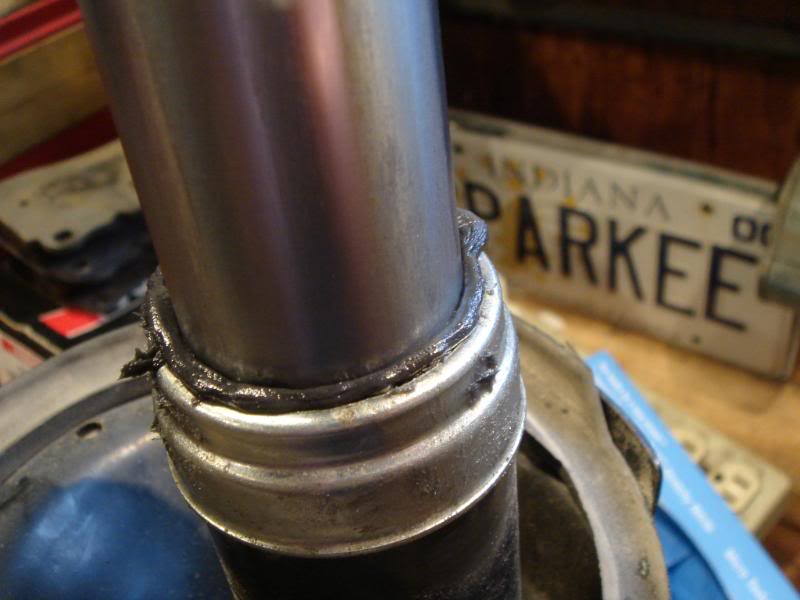
Next you will invert the strut to access this nut (14mm) which I will call the rod nut and remove it:
This will allow you to separate the gas strut from the strut housing:
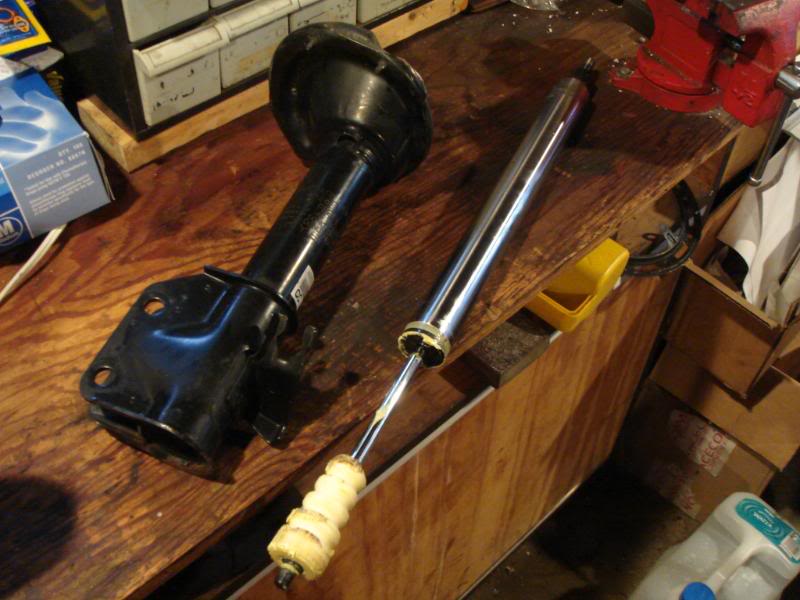
This is the basic anatomy of the gas strut.
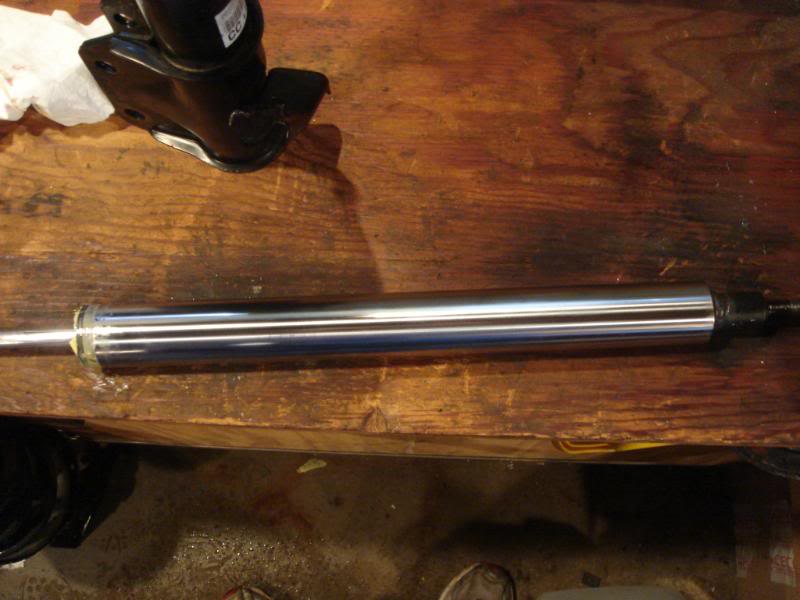
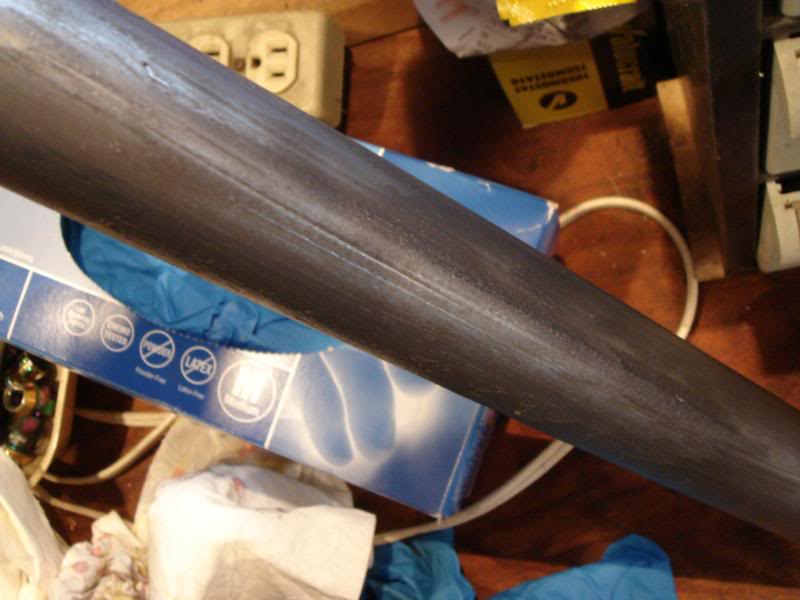
The shaft body:
The bump stop attached to the rod:
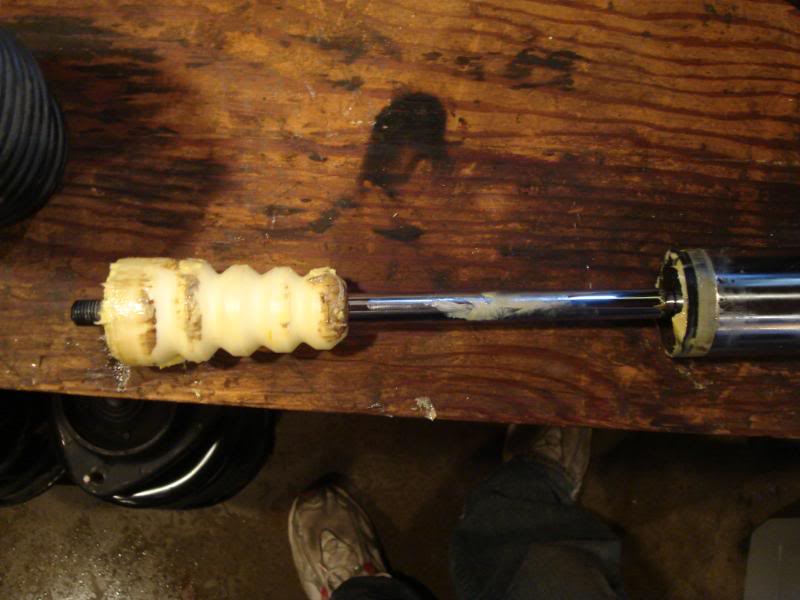
Notice the threaded part of the rod has a slot. This will be important later.
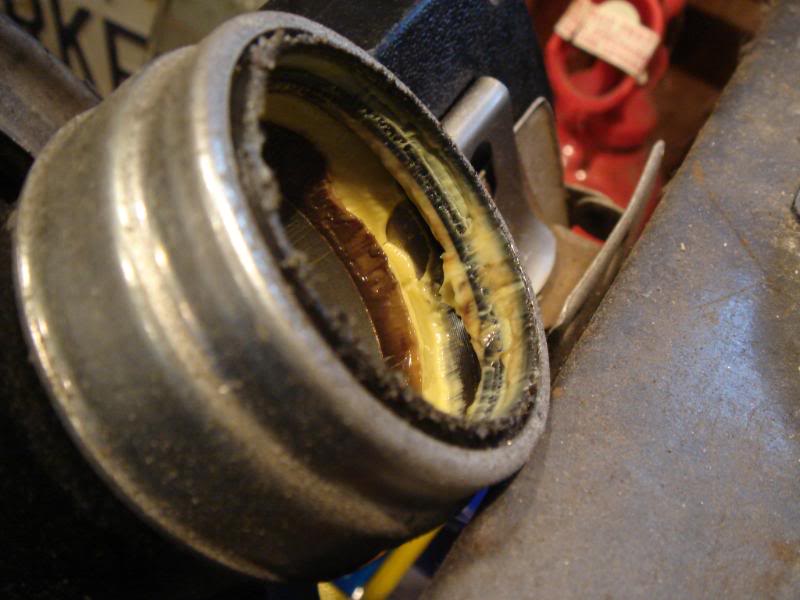
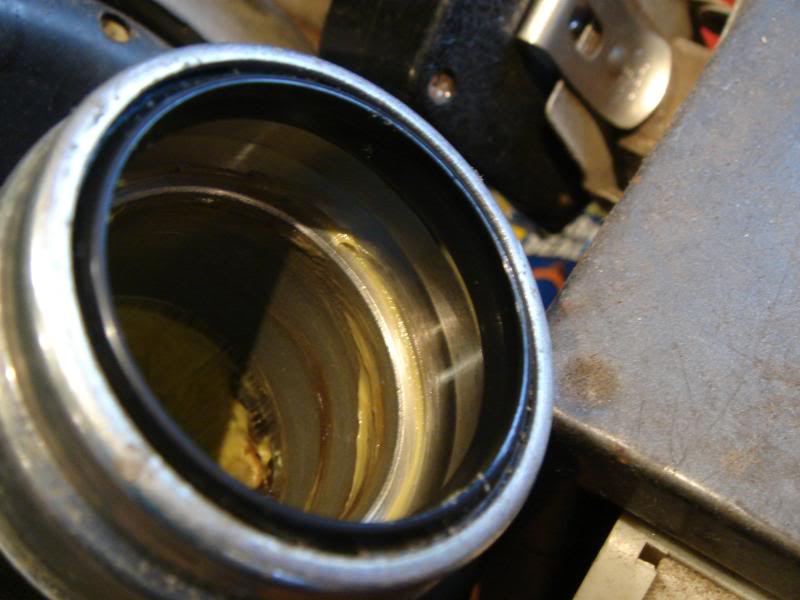
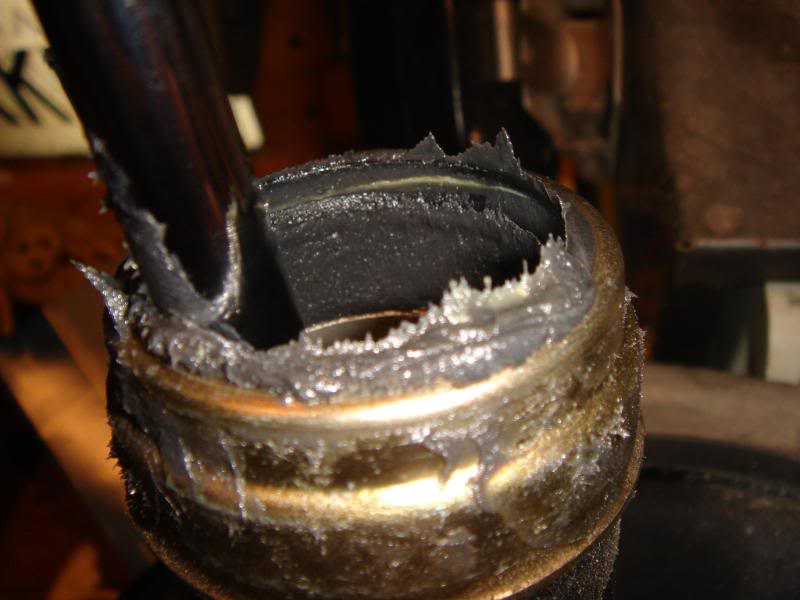
With the gas strut removed from the housing we are able to look inside the strut housing at the grease reservoir. This is an untouched since the factory strut with less than 10k miles on it. Notice how large the reservoir is and how little grease is inside it:
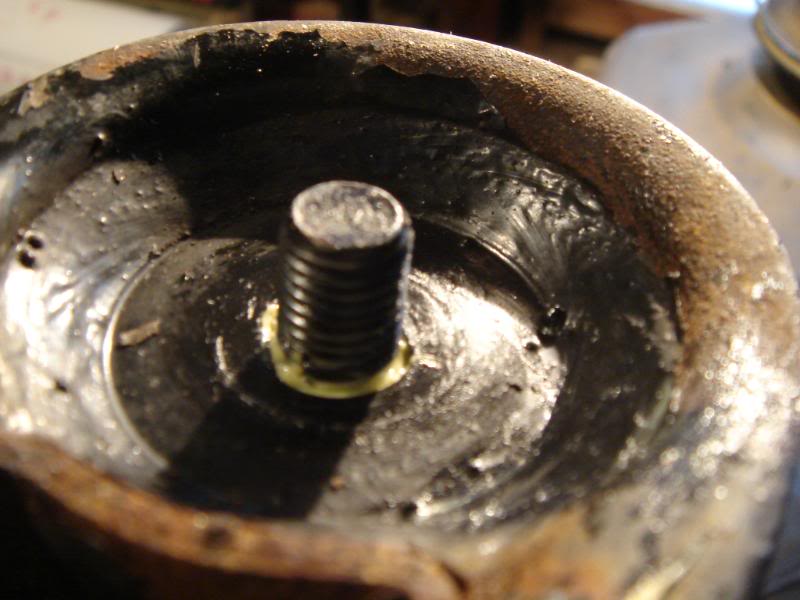
Grab a rag and remove the grease within the reservoir. All clean:
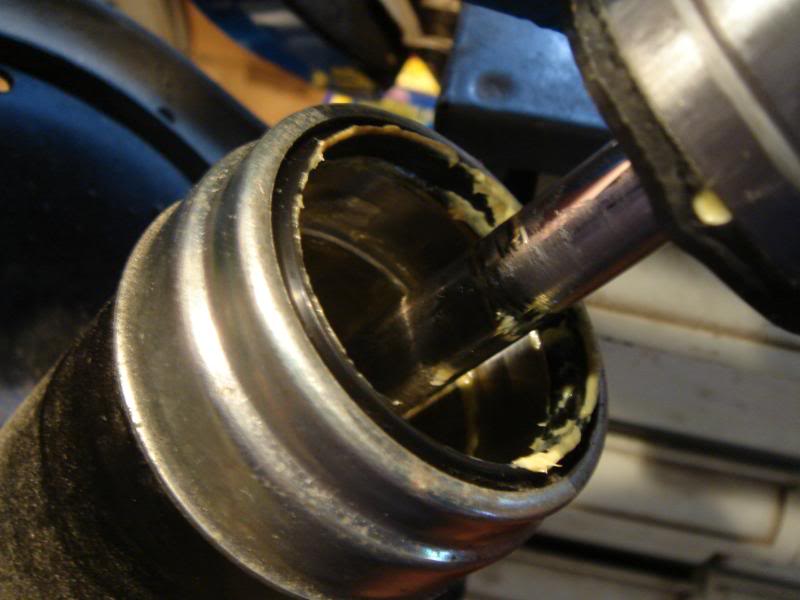
In order to keep the bump stop from removing some of the grease that we will be repacking into the reservoir, I recommend partially reinserting the bump stop and rod into the housing before repacking the reservoir. Like this:
Now for the grease. I recommend an NLGI #2 grease. This is the type of grease used from the factory. I have always used Valvoline Syn Power NLGI #2 grease. It is a lithium based grease with synthetic additives and is readily available from Autozone.
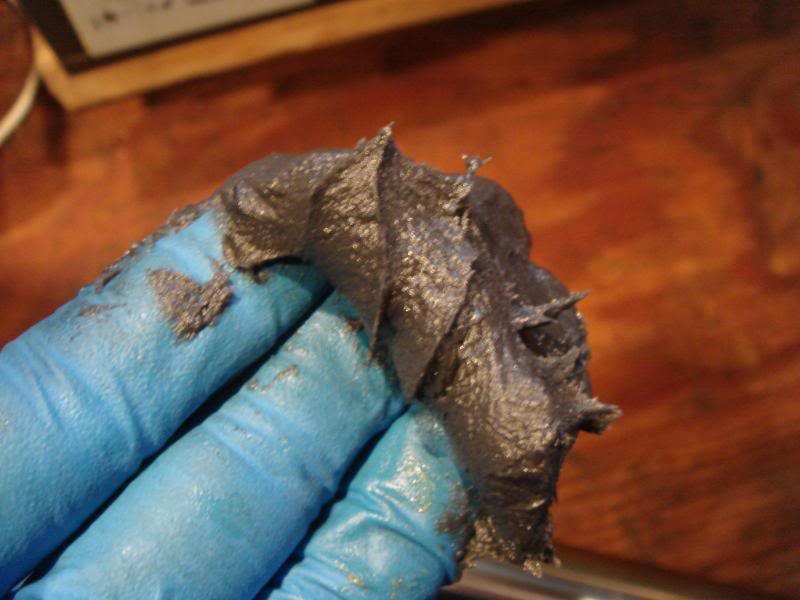
Grab about a golf ball sized amount of grease on your finger tips (this is where gloves come in handy):
Work the grease into the crevices of the grease reservoir with your finger tips (note: For illustration purposes, mainly so I can hold the camera, I have the gas strut totally removed for this picture, I am only a man with two arms) :
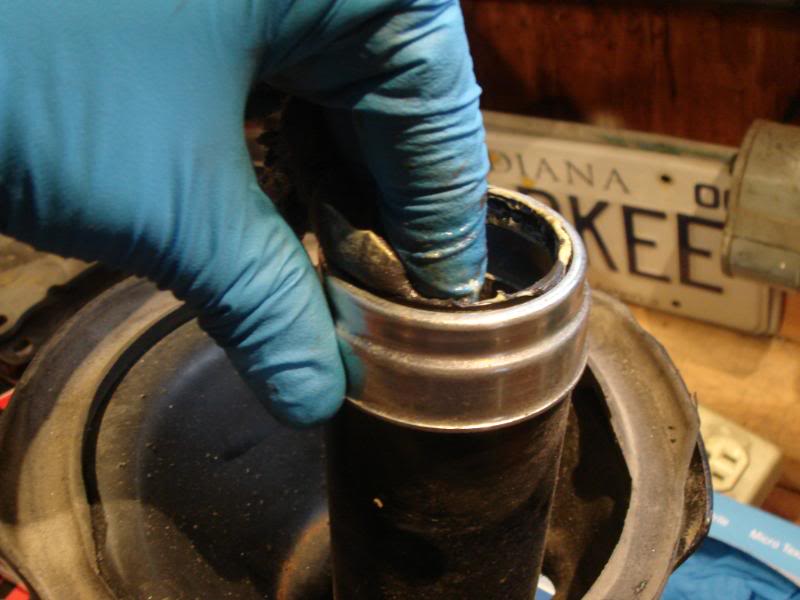
Grab a little more grease and apply it over the grease you just packed into the reservoirs. The reservoir should be overflowing with grease (again, one man, two arms, strut rod is not shown within the housing) :

Apply a light coating of grease on the entire strut shaft body:
Most of this grease will get wiped off by the shaft seal if it is still in good shape:
You could wipe the excess off but I recommend keeping it there to keep the seal lubricated and to keep foreign bodies out of the assembly.
Now slide the gas strut all the way in to the strut housing.
***This is just for illustration sake. You don't have to do this. Notice how full the reservoir is if you were to remove the gas strut again. Money:
Remember the slot I mentioned earlier on the threaded part of the strut rod? This is where that comes in to pay. There is a slot in the housing that accepts the slot from the rod. Invert the strut like we did before when removing the rod bolt. Rotate the gas strut within the strut housing until you feel the rod slide into the slot. There will be a tiny bit of play when the rod is slotted into the housing. You should not be able to turn the gas strut independent of the housing without a considerable amount of effort.
This is how much threading should be sticking out if the rod is properly slotted:
Keep some load on the inverted strut to keep the rod in the housing slot. Thread the 14mm bolt back onto the rod and tighten. There are no torque specs but a good approximation is as tight as you can get it with a ratchet while holding the strut in your hands (not a vice). I recommend putting some Blue Loctite on the threads to keep the nut from backing off. It's on there pretty tight from the factory.
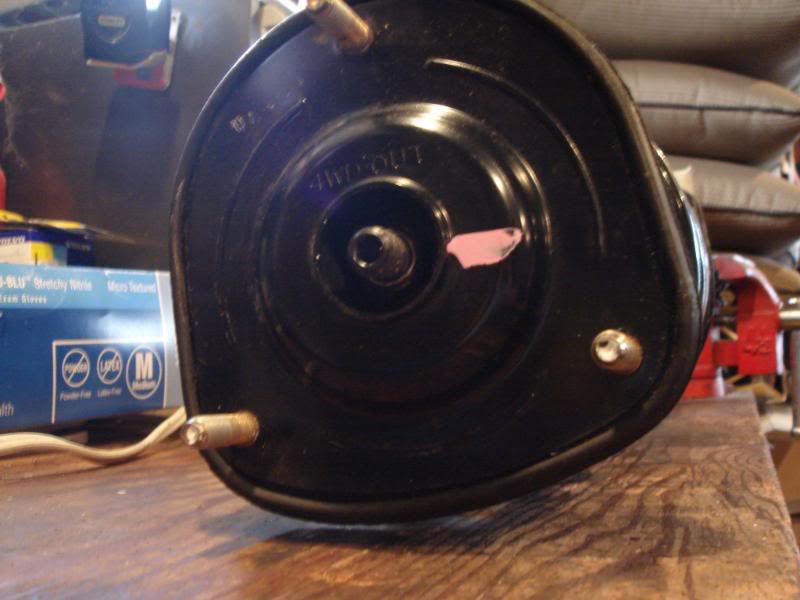
Flip the strut so it is upright again. We will now reinstall the spring and upper strut mount with dust shield. Properly seat the spring in the housing. Align the stud on the upper strut mount that has "4WD OUT" next to it with the knuckle attachment points. Like this:
Apply a load to the upper strut mount to compress the spring. While compressing, you will feel a point where the gas strut body will slide through and properly mate with the mount. I recommend removing the spring and putting the mount on so you can get a idea/feel for how the strut body and mount mate. Once properly compressed and seated, thread the 17mm nut on and torque to 55 N*M (41 ft*lbs). Or a quick zip with the impact.
Repeat for other strut(s).
Not going to go into the details or theories about what strut clunk is. There is some useful info mixed in with this thread on what strut clunk is.
This is my how to on what I believe is the most obvious cause of strut clunk. From what I have seen, strut clunk is caused by accelerated wear of strut components and the seizing of the rear struts as the rear end goes through its motions. It appears that this is all due to a lack of proper lubricant/lubrication from the factory. I also believe that suspension geometry plays a role. We can't change the latter so lets focus on what we can fix or at least do to attempt to prolong the life of the struts.
There are what I like to call grease reservoirs in the strut housings. They are channels that run the radius of the strut housing that are supposed to be full of grease. In every GD STi front and rear strut I have pulled apart, regardless of mileage, there is little and in some cases almost no grease in the reservoirs from the factory. We will be repacking these reservoirs with new grease so that the struts have proper lubrication and continue to function properly.
The assumption is that you already know how to pull the struts of the car. I would say that this process is just as difficult as pulling the struts off. Maybe slightly less so.
This How-To works for any year Impreza up to 2007 and applies to the front struts as well. Any McPherson inverted strut really. The only difference being that you will definitely need spring compressors to disassemble the front struts and most likely the rear struts on some other models (definitely not the GD STi). Mind your fingers.
This How-To could be handy if you're swapping out/cutting bump stops as well.
Here is the rear strut assembly as it sits off the car:
The "nice" thing about the GD STi rear struts is they don't have much spring preload on them. It's really only nice because it makes it possible to pull the rear struts apart without using spring compressors. I recommend having a second set of hands but it can be done by yourself as I have. If I had to make an educated guess, I would say there is about 20lbs on spring preload and a load of only double that needs to be applied to get the strut to compress enough to remove the upper strut mount nut. I'm not suggesting you can be careless and not get hurt but only that applying some force to the top of the strut compresses the spring more than enough to safely remove the nut that holds the spring/strut/upper strut mount assembly together.
First, we need to remove the nut holds the spring/strut/upper strut mount assembly together. Shown here:
There are two ways to do this. The "proper" way is to use a Subaru strut mount socket or a through ratchet and a hex bit socket. This will require a second set of hands. The other way is to use an impact gun and just zip the socket off. It's really the only way to do it if you're alone and don't have spring compressors and is generally quicker. I've had success with both the "proper" and the impact gun method. Just don't over torque the upper strut mount nut upon reassembly.
Turn the strut assembly so it is upright as if it were attached to the car. Set the strut on a hard surface (ie concrete) and apply enough load to compress the spring slightly. Remove the upper strut mount nut (17mm nut). Again, there isn't much preload on the spring so it will not shoot off. You will then be able to remove the strut top hat and the spring.
Disassembled pieces (you don't have to separate the dust shield from the top hat, done for illustrative purposes):
Next you will invert the strut to access this nut (14mm) which I will call the rod nut and remove it:
This will allow you to separate the gas strut from the strut housing:
This is the basic anatomy of the gas strut.
The shaft body:
The bump stop attached to the rod:
Notice the threaded part of the rod has a slot. This will be important later.
With the gas strut removed from the housing we are able to look inside the strut housing at the grease reservoir. This is an untouched since the factory strut with less than 10k miles on it. Notice how large the reservoir is and how little grease is inside it:
Grab a rag and remove the grease within the reservoir. All clean:
In order to keep the bump stop from removing some of the grease that we will be repacking into the reservoir, I recommend partially reinserting the bump stop and rod into the housing before repacking the reservoir. Like this:
Now for the grease. I recommend an NLGI #2 grease. This is the type of grease used from the factory. I have always used Valvoline Syn Power NLGI #2 grease. It is a lithium based grease with synthetic additives and is readily available from Autozone.
Grab about a golf ball sized amount of grease on your finger tips (this is where gloves come in handy):
Work the grease into the crevices of the grease reservoir with your finger tips (note: For illustration purposes, mainly so I can hold the camera, I have the gas strut totally removed for this picture, I am only a man with two arms) :
Grab a little more grease and apply it over the grease you just packed into the reservoirs. The reservoir should be overflowing with grease (again, one man, two arms, strut rod is not shown within the housing) :
Apply a light coating of grease on the entire strut shaft body:
Most of this grease will get wiped off by the shaft seal if it is still in good shape:
You could wipe the excess off but I recommend keeping it there to keep the seal lubricated and to keep foreign bodies out of the assembly.
Now slide the gas strut all the way in to the strut housing.
***This is just for illustration sake. You don't have to do this. Notice how full the reservoir is if you were to remove the gas strut again. Money:
Remember the slot I mentioned earlier on the threaded part of the strut rod? This is where that comes in to pay. There is a slot in the housing that accepts the slot from the rod. Invert the strut like we did before when removing the rod bolt. Rotate the gas strut within the strut housing until you feel the rod slide into the slot. There will be a tiny bit of play when the rod is slotted into the housing. You should not be able to turn the gas strut independent of the housing without a considerable amount of effort.
This is how much threading should be sticking out if the rod is properly slotted:
Keep some load on the inverted strut to keep the rod in the housing slot. Thread the 14mm bolt back onto the rod and tighten. There are no torque specs but a good approximation is as tight as you can get it with a ratchet while holding the strut in your hands (not a vice). I recommend putting some Blue Loctite on the threads to keep the nut from backing off. It's on there pretty tight from the factory.
Flip the strut so it is upright again. We will now reinstall the spring and upper strut mount with dust shield. Properly seat the spring in the housing. Align the stud on the upper strut mount that has "4WD OUT" next to it with the knuckle attachment points. Like this:
Apply a load to the upper strut mount to compress the spring. While compressing, you will feel a point where the gas strut body will slide through and properly mate with the mount. I recommend removing the spring and putting the mount on so you can get a idea/feel for how the strut body and mount mate. Once properly compressed and seated, thread the 17mm nut on and torque to 55 N*M (41 ft*lbs). Or a quick zip with the impact.
Repeat for other strut(s).