
Installing Koni Inserts
These instructions will be assuming you are starting
from bare stock struts and I am not going to go back
into the final assembly with springs and top hats either
since that's also documented well.
The donor struts came from an '04 WRX Wagon and seemed to be in really good shape.
All of this would be better done in a vise, but we did not have one available in my garage. I really need to get a nice workbench.
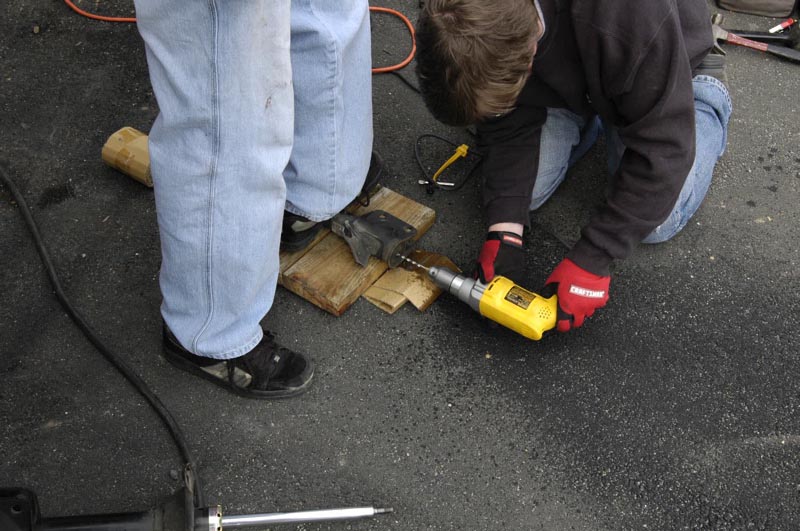
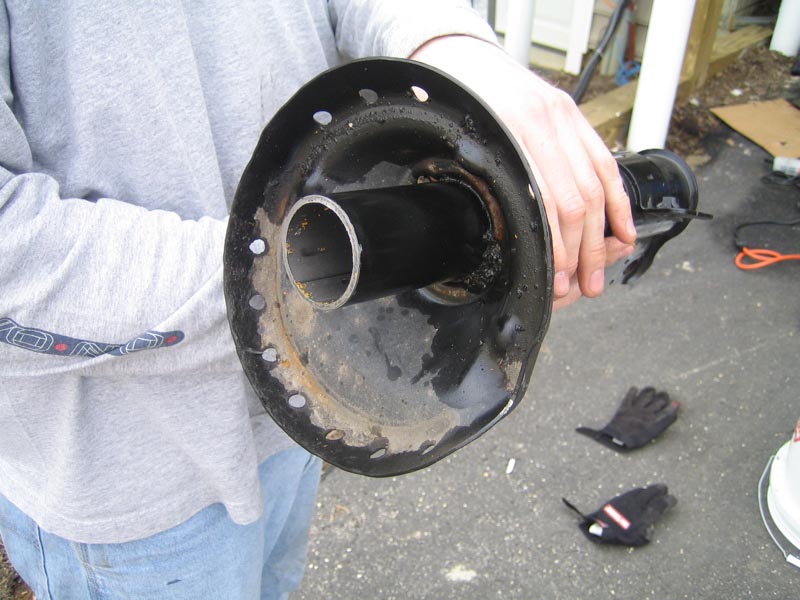
The first step is to mark the center of the bottom of the strut. Try to mark as close to dead center as you can since this will be the hole for all your future drilling. After you have marked the bottom with a punch, you can drill a small hole to release pressure in the strut. You will have a small fluid explosion when you drill through here and it WILL be messy.
^^^^
People have clarified that this will not happen if you drill them upside down in a vise. You will have a small off-gassing, but the fluid will stay in the strut.
The next step is to measure from the top of your new insert to the set of little raised bumps on the strut body (sorry, no picture of this right now, but you can see what I mean in a few later pictures). Ours measured 46mm and looking at the instructions that came with the inserts this meant we had to measure and cut 40mm off the top of the stock struts. In the following picture you can see the cutting taking place with a big pipe cutter. The pipe cutter works for the front struts, but does not fit on the rear struts. We had to use an angle grinder and Dremel to cut those.
Finished product after cutting. The pipe cutter did a great job of making a clean and smooth cut. The struts cut with the angle grinder and Dremel required some smoothing, but they also came out well.
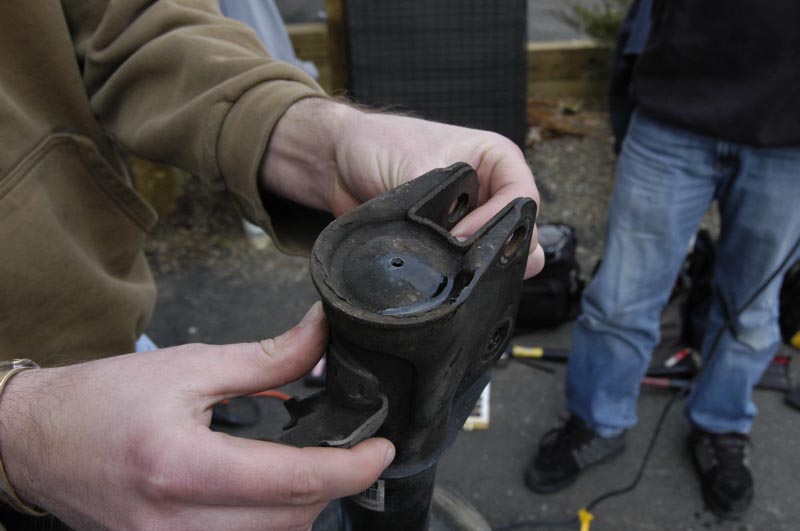
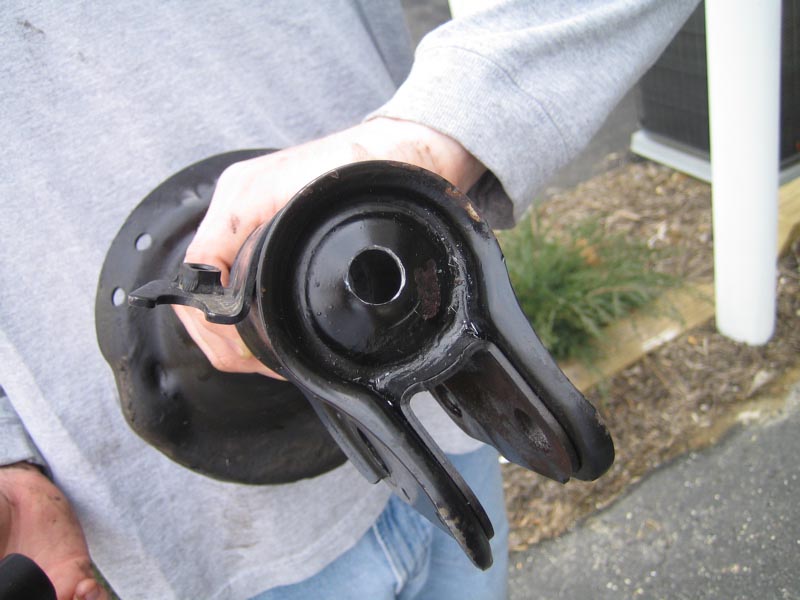
The next step is to drill a bigger hole in the bottom of the body where the bolt will be attached to hold the insert inside the body. The instructions call for a 14mm drill bit. We used a 9/16" drill bit. I had to go and buy a set at Harbor Freight in order to get a metal bit big enough.
This is why you need to mark as close to the center as you possibly can with that first punch and hole. Ours was a little off, but it turned out okay. The 9/16" bit is slightly bigger than 14mm, so you will have a tiny bit of play, which is probably better since it's going to be hard to get the exact center.
Now that cutting and prep is done, we can start the assembly.
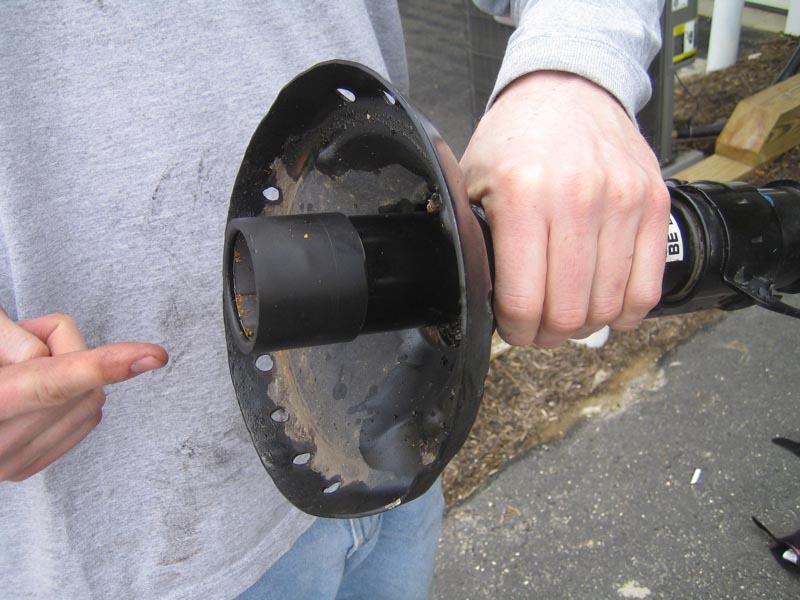
Take the little rubber boot and slip it onto the strut body.
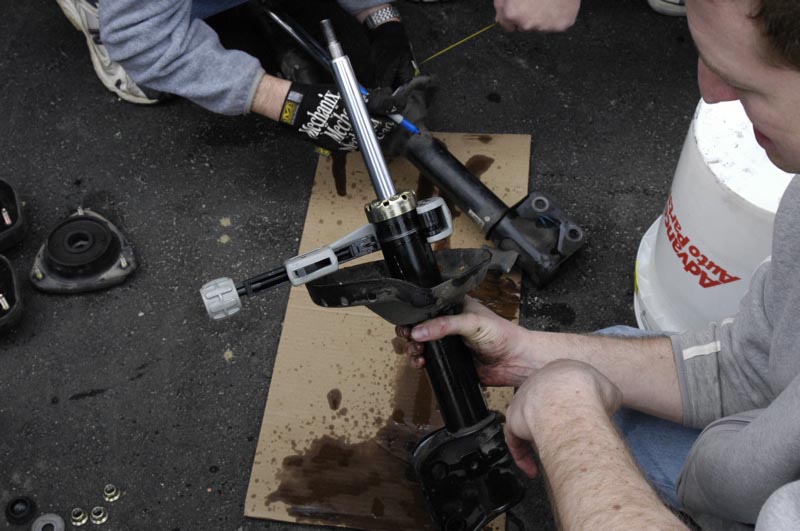
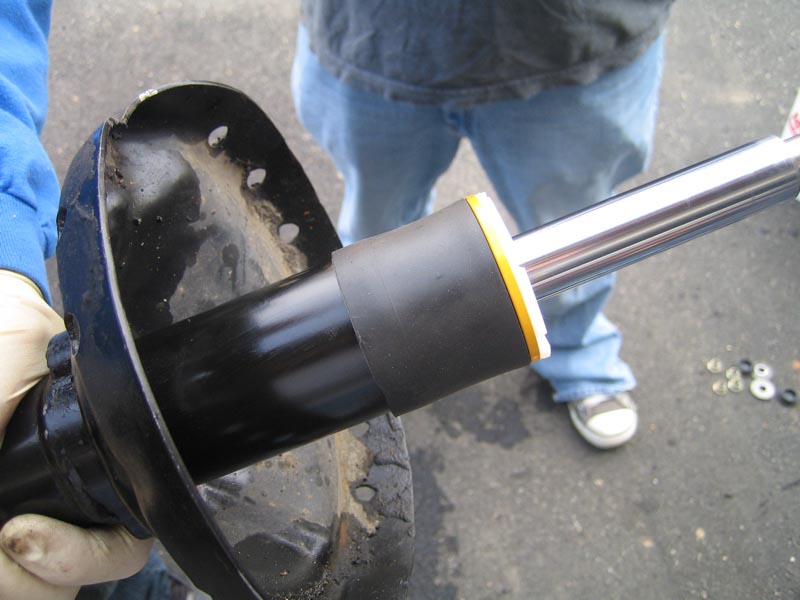
Insert the new Koni Insert into the strut body. Here you can see the little raised bumps that I talked about earlier for measuring. The insert will slide down until these bumps rest on the strut body.
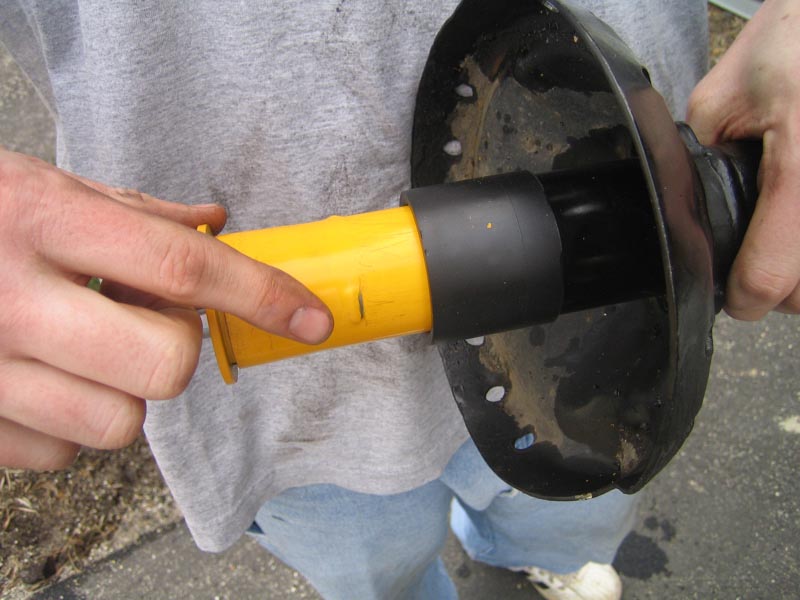
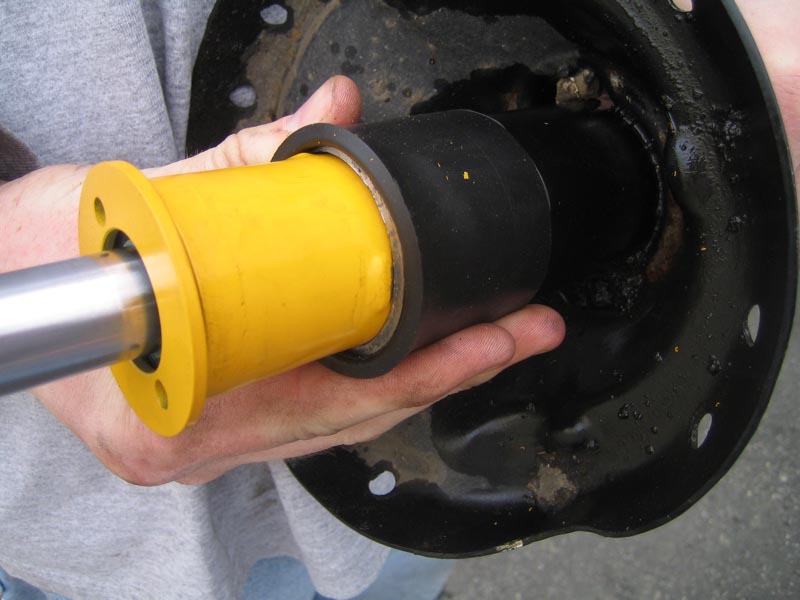
The insert will not be flush with the bottom of the strut body yet.
The donor struts came from an '04 WRX Wagon and seemed to be in really good shape.
All of this would be better done in a vise, but we did not have one available in my garage. I really need to get a nice workbench.
The first step is to mark the center of the bottom of the strut. Try to mark as close to dead center as you can since this will be the hole for all your future drilling. After you have marked the bottom with a punch, you can drill a small hole to release pressure in the strut. You will have a small fluid explosion when you drill through here and it WILL be messy.
^^^^
People have clarified that this will not happen if you drill them upside down in a vise. You will have a small off-gassing, but the fluid will stay in the strut.
The next step is to measure from the top of your new insert to the set of little raised bumps on the strut body (sorry, no picture of this right now, but you can see what I mean in a few later pictures). Ours measured 46mm and looking at the instructions that came with the inserts this meant we had to measure and cut 40mm off the top of the stock struts. In the following picture you can see the cutting taking place with a big pipe cutter. The pipe cutter works for the front struts, but does not fit on the rear struts. We had to use an angle grinder and Dremel to cut those.
Finished product after cutting. The pipe cutter did a great job of making a clean and smooth cut. The struts cut with the angle grinder and Dremel required some smoothing, but they also came out well.
The next step is to drill a bigger hole in the bottom of the body where the bolt will be attached to hold the insert inside the body. The instructions call for a 14mm drill bit. We used a 9/16" drill bit. I had to go and buy a set at Harbor Freight in order to get a metal bit big enough.
This is why you need to mark as close to the center as you possibly can with that first punch and hole. Ours was a little off, but it turned out okay. The 9/16" bit is slightly bigger than 14mm, so you will have a tiny bit of play, which is probably better since it's going to be hard to get the exact center.
Now that cutting and prep is done, we can start the assembly.
Take the little rubber boot and slip it onto the strut body.
Insert the new Koni Insert into the strut body. Here you can see the little raised bumps that I talked about earlier for measuring. The insert will slide down until these bumps rest on the strut body.
The insert will not be flush with the bottom of the strut body yet.
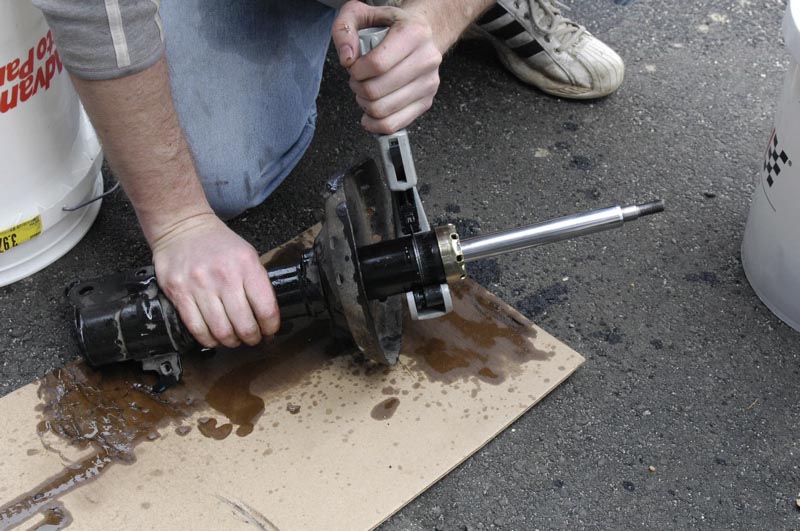
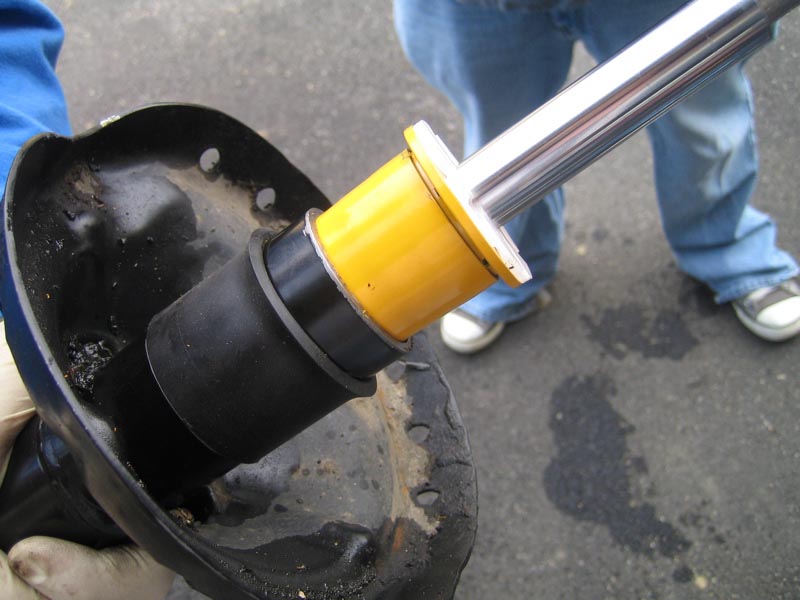
Take the bolt for the bottom of the assembly, insert it, and begin to tighten it down. We torqued to the specs on the instructions, which was 55 ft-lb.
You can now see that the bumps that were resting on the strut body have been sucked down into the strut body by tightening that bottom bolt.
Take the rubber boot and slide it up over the gap.
That's it...all done! Now reassemble as you normally would and reinstall.