
Timing Belt and Water Pump Replacement
Tools
used:
3/8 Ratchet
1/2 Ratchet
10, 12, 14, 22mm sockets
short extension
Impact wrench or strap wrench (I used both on separate occasions.)
Torque Wrench
Small metal ruler to measure belt deflection.
Drain pan and funnel for the coolant.
Brake Kleen
Lots of paper towels/shop rags.
3/8 socket driver (very handy.)
Feeler gauges
2mm allen wrench
allen socket for the right camshaft (6mm maybe?)
C-Clamp
1. Remove the air intake.
2.
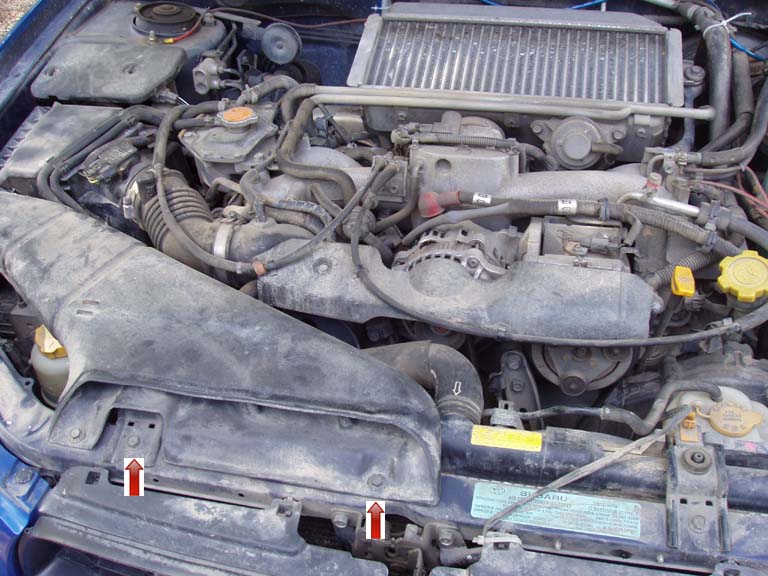
Remove the coolant reservoir by taking out the two screws at the top.
3.Remove the fans. There is an electrical connector at the bottom and to the outsides of each fan. I believe you pull the tab out and pull the connectors apart, as opposed to the more common push kind. There are some bolts at the top.
4. Drain the coolant at the lower passenger side of the radiator. Unbolt the radiator at the top, disconnect the hoses and remove it.
5. Take off the belt cover.
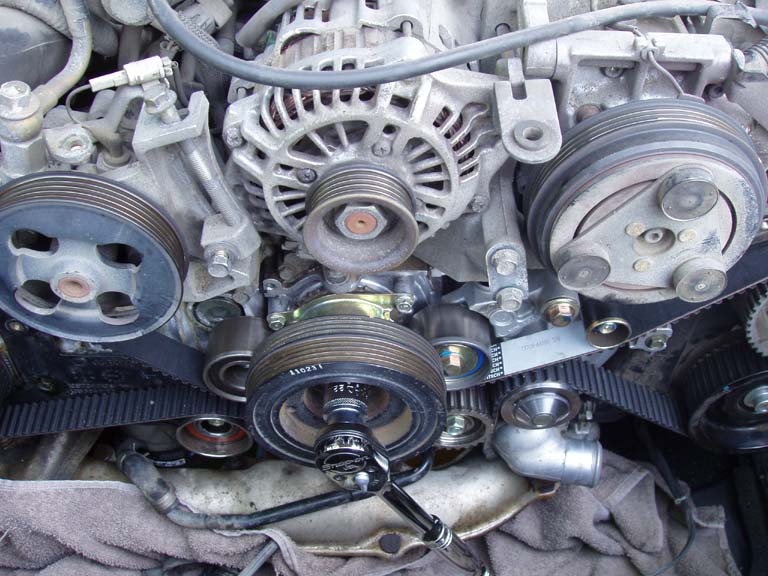
6. Take off the V belts.
3.Remove the fans. There is an electrical connector at the bottom and to the outsides of each fan. I believe you pull the tab out and pull the connectors apart, as opposed to the more common push kind. There are some bolts at the top.
4. Drain the coolant at the lower passenger side of the radiator. Unbolt the radiator at the top, disconnect the hoses and remove it.
5. Take off the belt cover.
6. Take off the V belts.

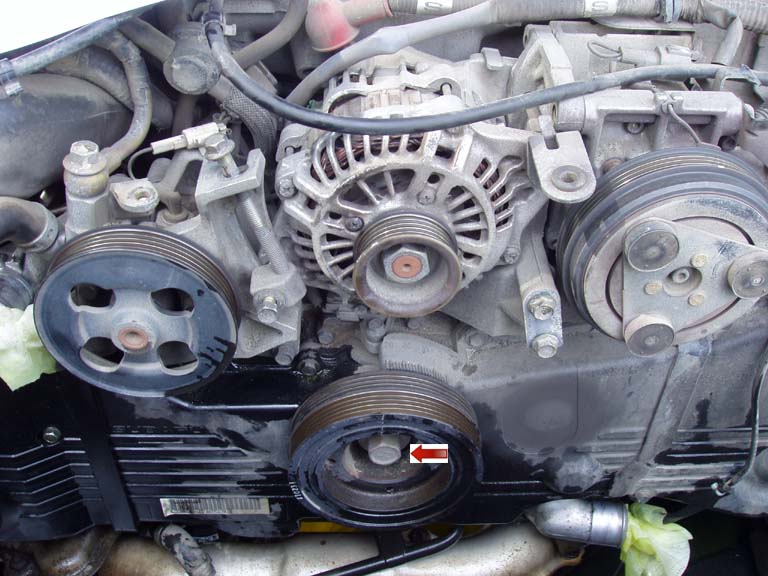
7. Remove the crankshaft pulley. You'll need an impact wrench or a strap wrench to hold the pulley still. You'll need a 22mm socket.
8.
Take off the timing belt covers. Note that the one with the blue arrow
is shorter than the rest.
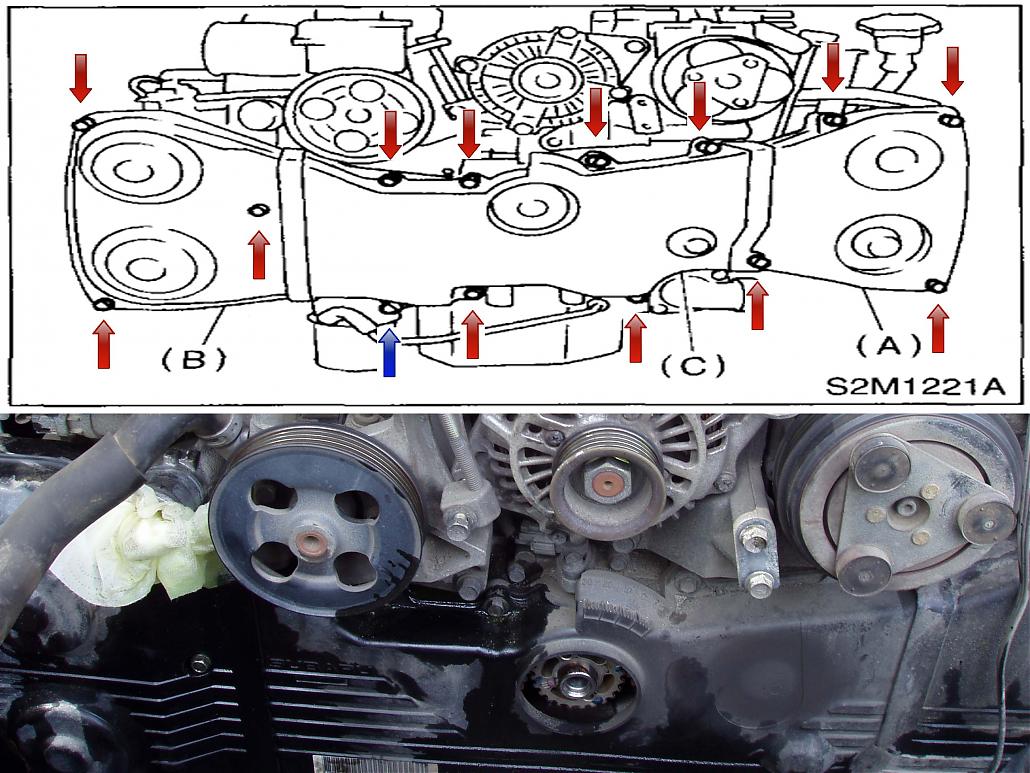
Without the covers.
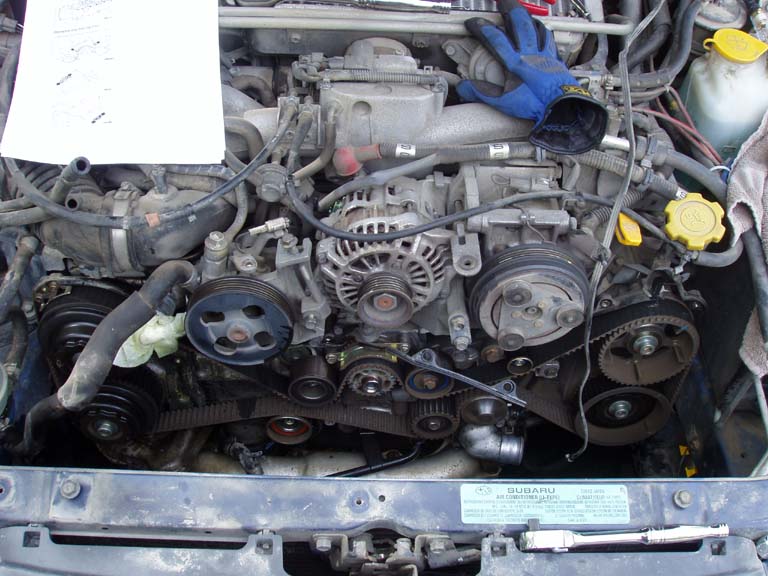
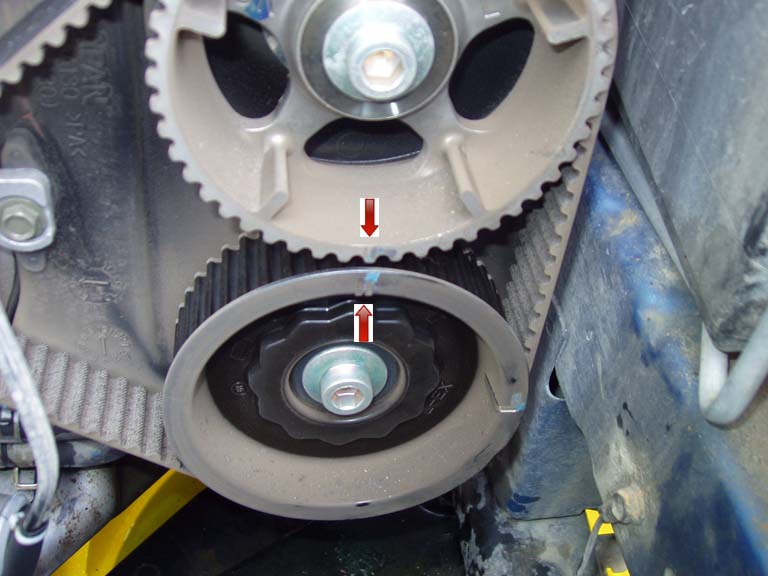
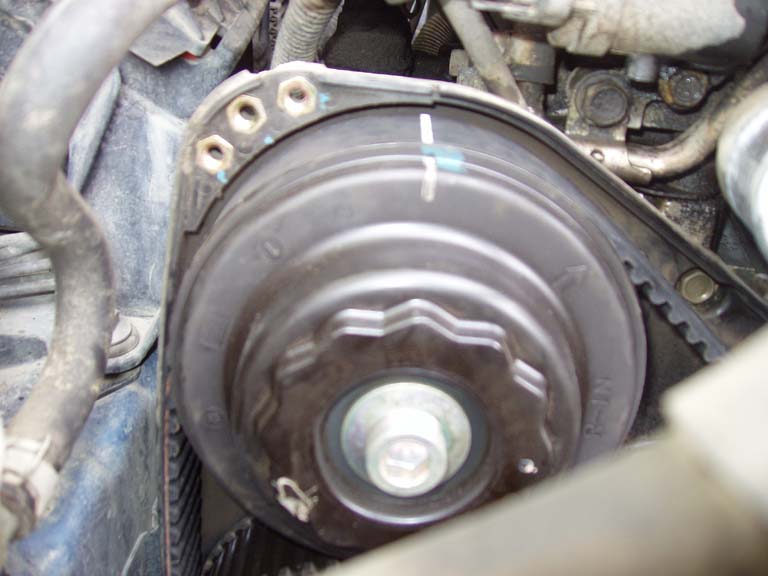
9. Reinstall the crankshaft pulley and rotate the engine until all the timing marks line up. This way you can see how the engine was timed prior to having to do it. Note that the crankshaft pulley is keyed. Do not start threading the bolt until you have the pulley in place.
crankshaft timing:
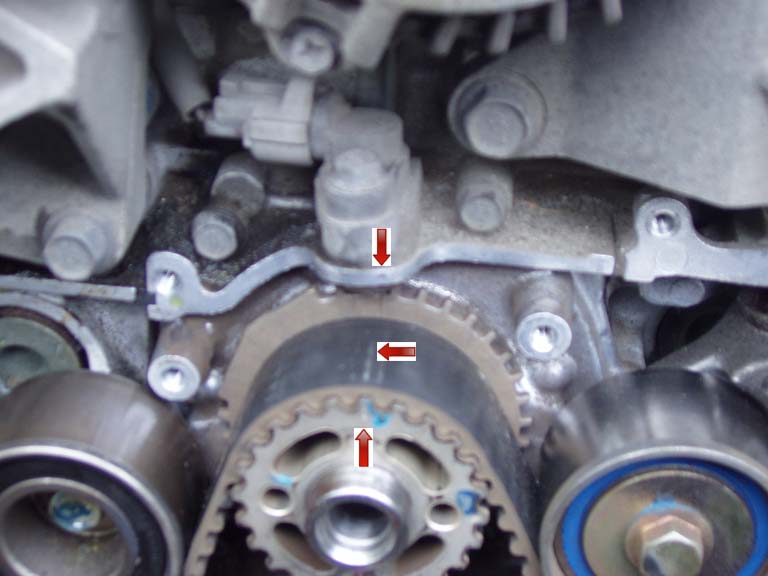
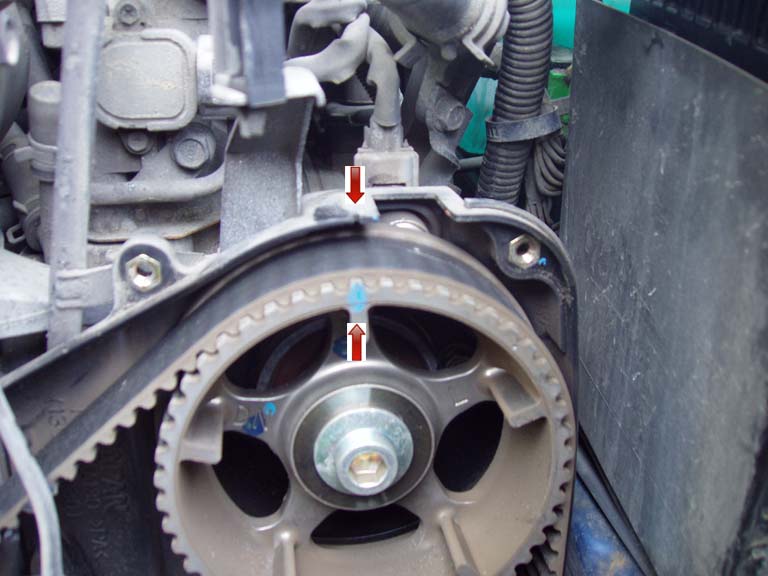
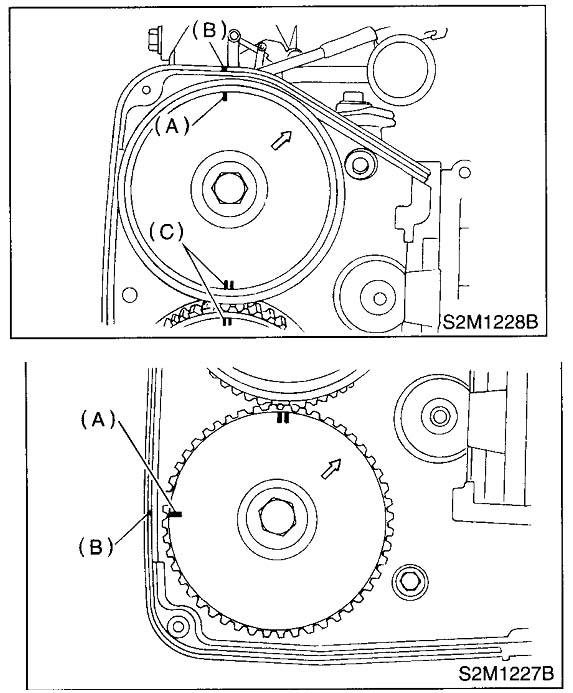
Upper Left:
Notice that the lines on the old belt are all rubbed off.
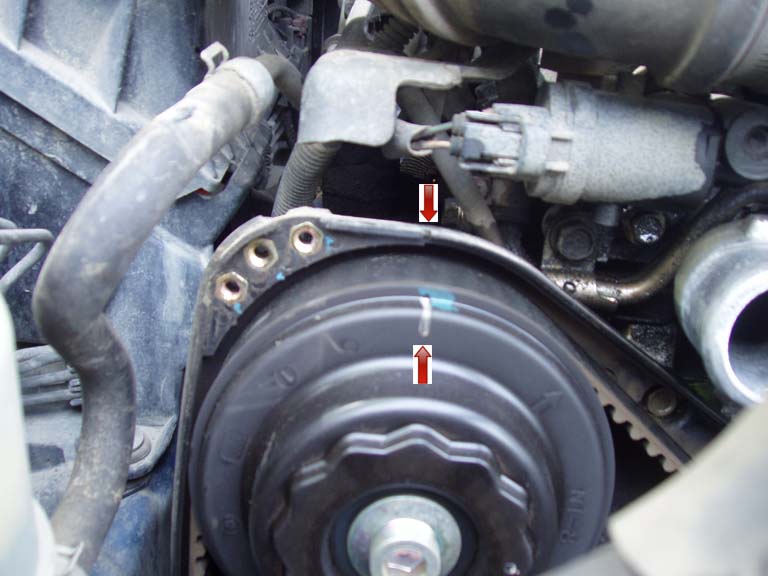
Middle Left:
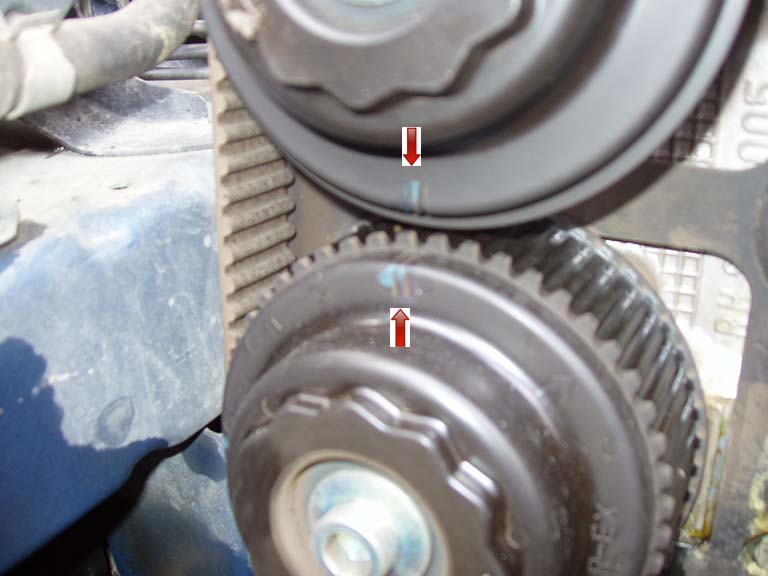
Upper Right:
Middle Right:
Note that everything was not perfectly aligned after I got the crankshaft timed. Things were just slightly off. The crankshaft is what I timed when I removed the belt.
Note that everything was not perfectly aligned after I got the crankshaft timed. Things were just slightly off. The crankshaft is what I timed when I removed the belt.
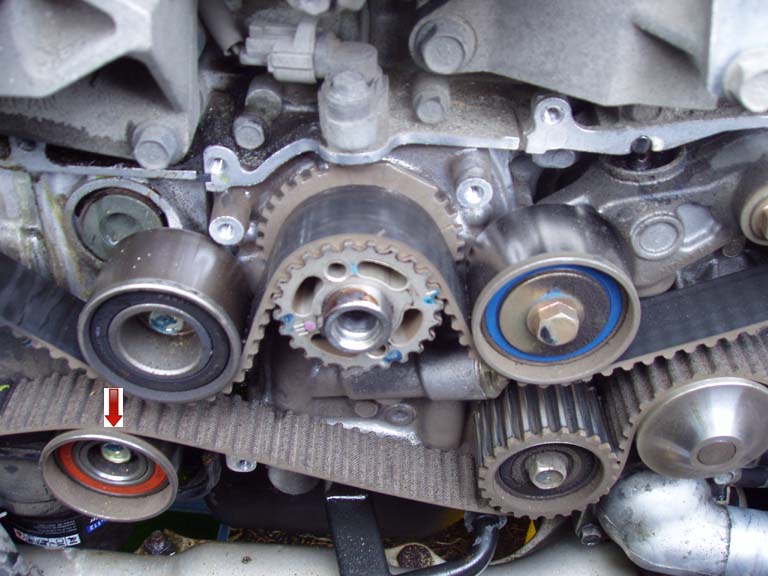
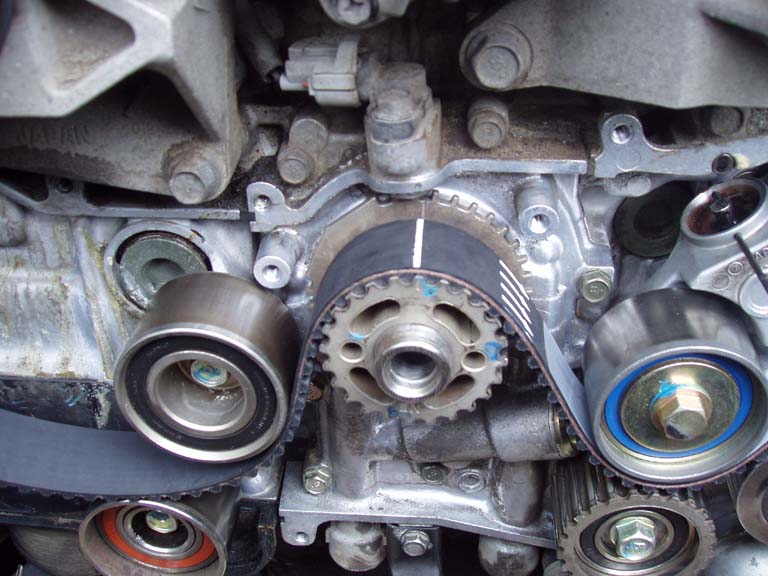
10. Remove the timing belt guides.
a: crankshaft
b: upper left
c: lower right

11. Remove the belt idler.
12. Remove the timing belt.
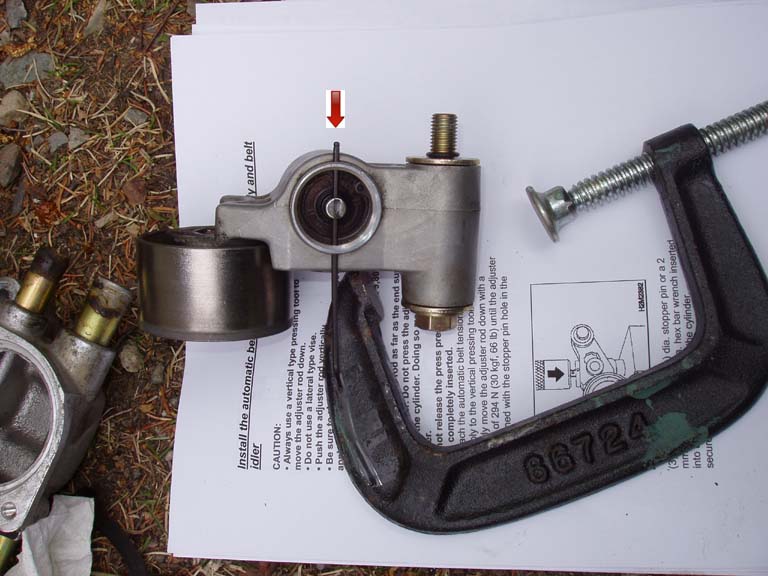
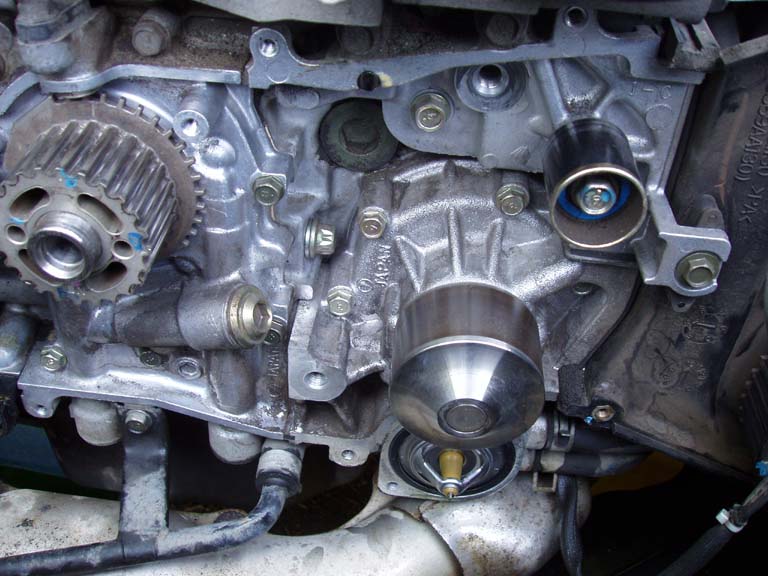
13. Remove the hydraulic belt tensioner.
14. Compress the hydraulic belt tensioner pin. The manual says to use a vertical press, but I did it with a C-clamp. You're supposed to do it over 3 minutes time, so take your time and compress it slowly. Once you get it down, use a 2mm allen wrench to secure the pin in place.
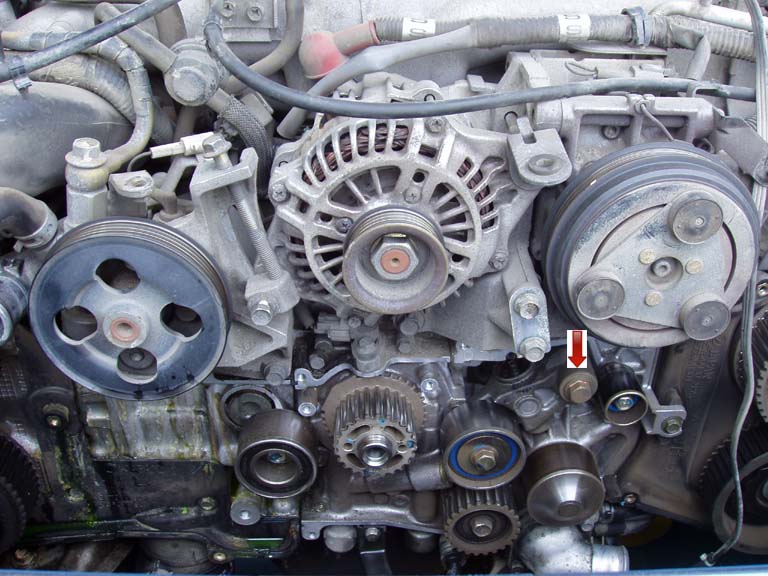
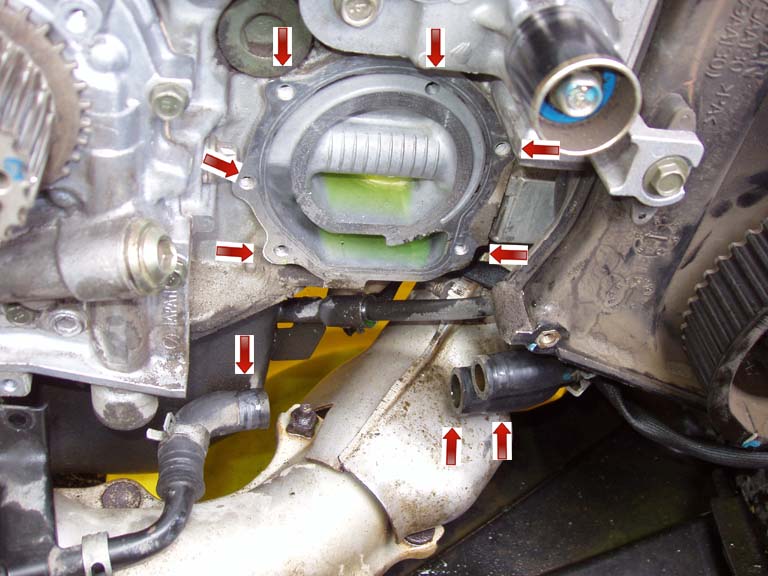
15. Remove the water pump outlet hose, thermostat cover, and then the water pump. Note that some of the bolts are hidden from view.
Here are the bolt holes.
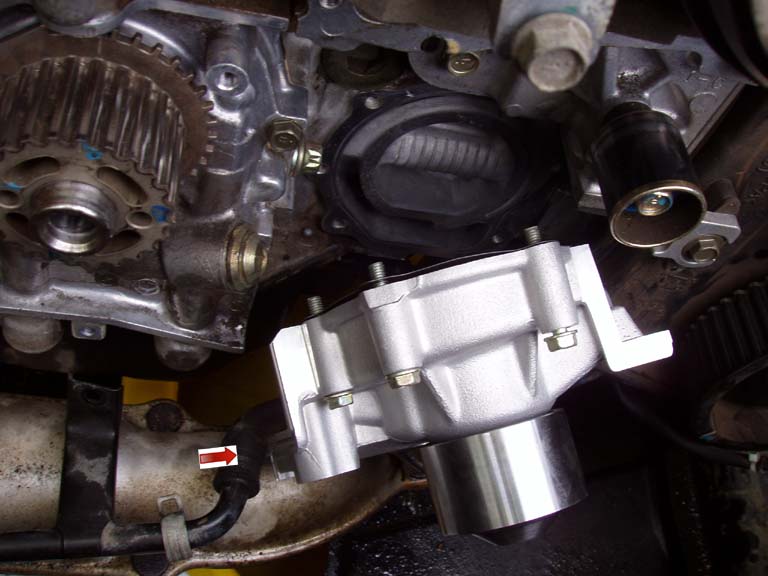
16. Clean the mating surface on the engine. Put your new thermostat into your new water pump. Make sure you transfer the rubber seal on the side of the old water pump to the new water pump. The arrow shows where it should go, though I forgot to put it on. Your new water pump should come with a new gasket. Connect your hoses first then push a few bolts through and put the gasket onto it. Then lightly thread the bolts in. Make sure you get all the bolts in as two of them are out of sight when the water pump is mounted!!!
17. Give the engine a good cleaning and clean off all the idlers and sprockets. Feel the sprockets to make sure there are no burs are sharp points to cut the belt.
18. Reinstall the idler to 29 foot lbs. Use a torque wrench.
19. Go find a buddy for the extra hands. First I lined up on the crankshaft. Place the belt tensioner onto the belt to help hold it in place. It's easier if you don't install the tensioner yet. Note that your new belt will have lines that correspond to the timing marks.
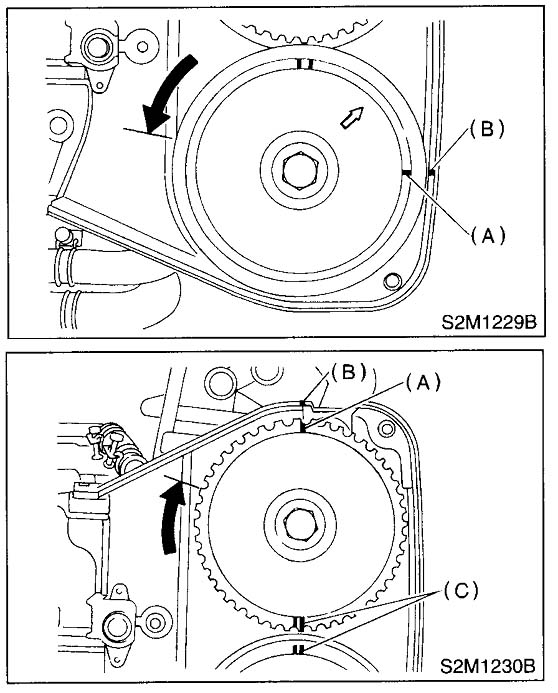
20. Route the belt over the left side and get it timed correctly. Keep the belt tight.
21. Line up these marks. Note that there is a timing mark on the side. This will correspond to a notch in the case - to the line on your belt - to the mark on the camshaft. You have to get this lined up along with timing marks between the two camshafts. The belt has to be tight or else you'll get the top and the middle lined up, but the side will not be lined up.
22. The right side cams (as you're facing the car) is under tension and will spin during the course of your work. You'll need an allen socket and ratchet to get the bottom cam timed and to keep in in place as you work the belt on. Someone needs to keep the belt in place and keep everything in proper timing as you work to get the belt around the bottom right cam. Only move the cams in specified directions to avoid damaging the valves!
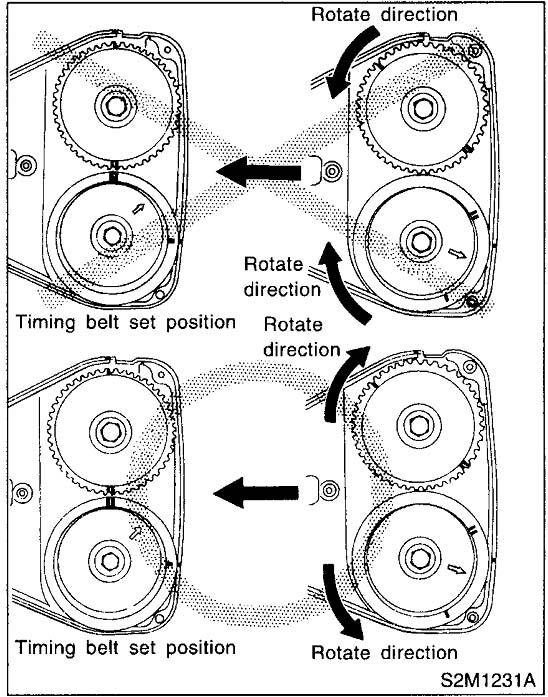
23. The timing on this side is the exact same as the other side. You have to line up the side, middle, and top and keep the belt tight. It was a bit of work to get it all lined up as this side is under tension and you are now running out of belt free length. Any slack in the belt up to this point will show up by the lines on the belt not matching the timing marks on the side and the top. They all have to line up! It actually may be better to start on this side as you'll have the entire belt free.
24. Install the belt
tensioner. Torque to 29 foot lbs.
25. Recheck ALL your timing marks. Anything amiss should be fixed. I'm not a Subaru tech, but with motorcycles, being off a tooth will cause it to run poorly and being off a few will definitely cause piston to valve contact. This is catastrophic failure!
Once you're satisfied that the timing is correct, remove the allen key that's been holding the belt tensioner pin in place.

26. Reinstall the timing belt guides with a clearance of 0.5-1.5mm.
27. Reinstall the crankshaft pulley and rotate the crankshaft several revolutions to make sure your timing is correct and there are no solid stops. Don't force it if there is as your valves are hitting each other or the piston.
28. Remove the crankshaft pulley.
29. Install the three timing belt covers.
30. Install the crankshaft pulley and torque it to 94 ft lbs. Don't forget that the pulley is keyed and will only fit on one way.
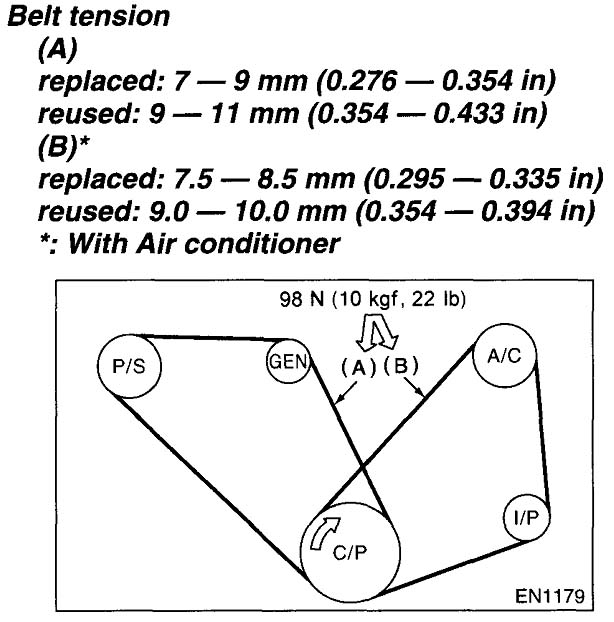
31. Install the a/c belt tensioner and a/c belt. Adjust the belt to 7.5 - 8.5mm of deflection.
32. Install the alternator belt and adjust it to 7 - 9mm of deflection.
33. Install the radiator.
34. Install the fans.
35. Install the coolant reservoir.
36. Fill with coolant at the cap near the turbo. It helps to have the car on an incline and fill slowly. You'll get lots of bubbles. It took me quite a while to do this. It takes up to 2 gallons and I put in about 1.8 gallons.
37. Reinstall the air intake.
38. Now if you're sure you got it right, start the car and let it warm up. Immediately kill it if there is any knocking or clanging. Add coolant mix as needed and keep an eye on the temperature.
Thats it! You are done!