
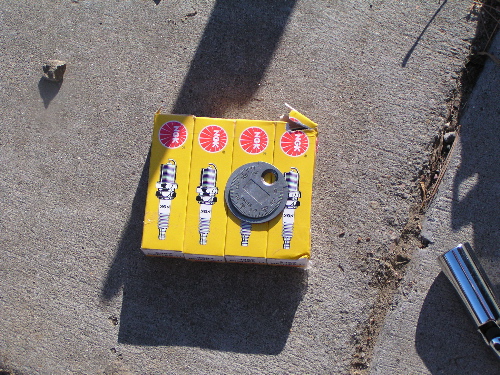
Spark Plug Replacement
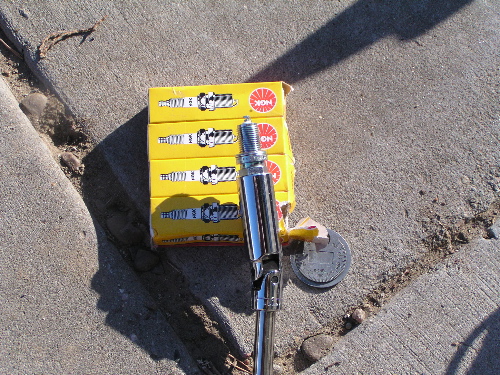
First you'll need to properly gap your
selected spark plugs- factory calls for
.028-.031 gap, yours may vary depending
on model i.e. iridium or needs. Lots of
info out there on choices of plugs- I
won't go into any of it here.
You'll need to use some kind of gapping device and you'll want an accurate gap. Here's the tool I used:
You'll need to use some kind of gapping device and you'll want an accurate gap. Here's the tool I used:
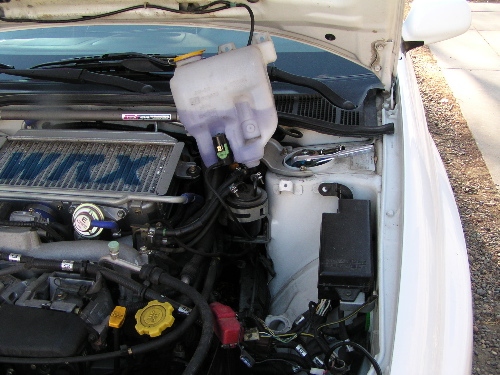
We'll start on the drivers side, but
first we'll have to make some room.
The battery as well as the washer
needs to come out,
Two 10mm nuts on the battery, two 10mm bolts on the washer bottle and a connector:
Two 10mm nuts on the battery, two 10mm bolts on the washer bottle and a connector:
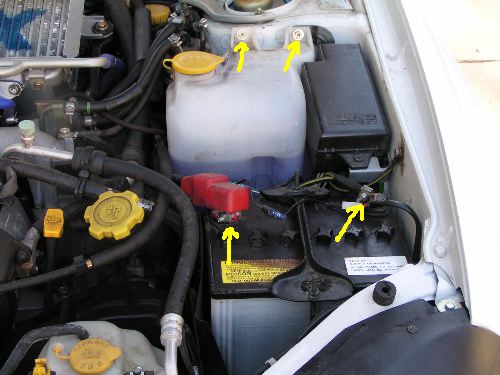
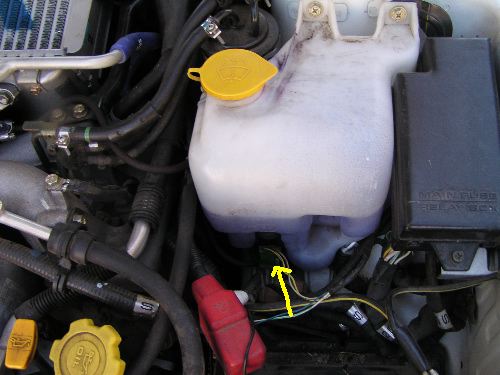
Here's where the connector is on the washer bottle:
I'd highly recommend a few "specialty" tools to tackle this job. First a set of flex head sockets to get at the coilpacks, you'll use these on lots of jobs:
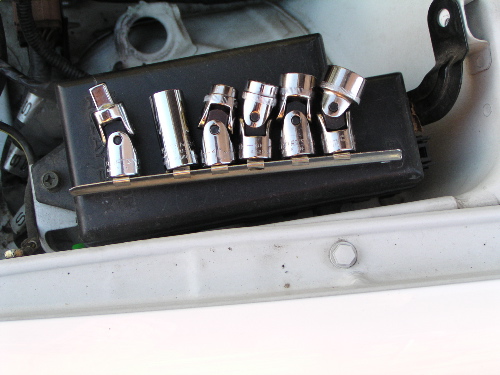
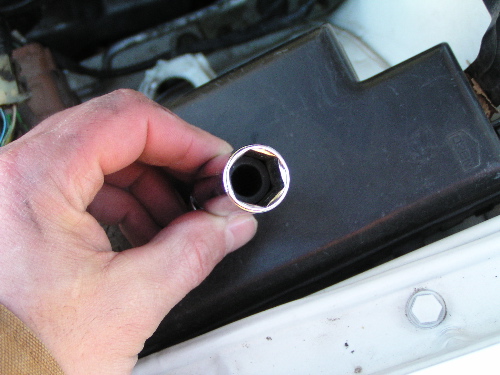
Next a flex spark plug socket:
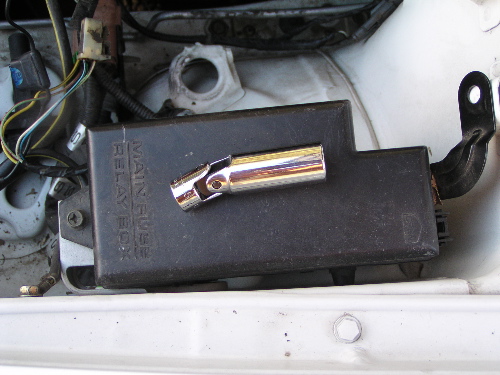
The spark plug socket has rubber inside of it to hold the spark plug:
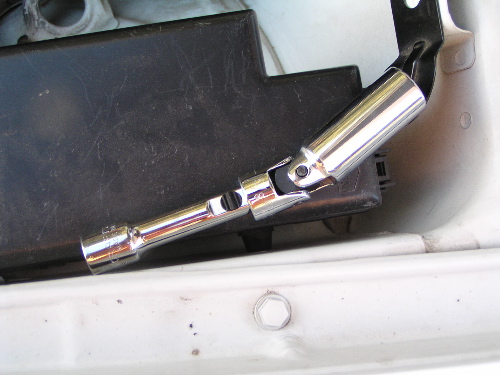
A variety of extensions, I like the ones that are "lockable" so the extension doesn't come off the socket:
With everything out of the way, we'll first remove the coil packs. I
undo the connectors to each coil pack first:
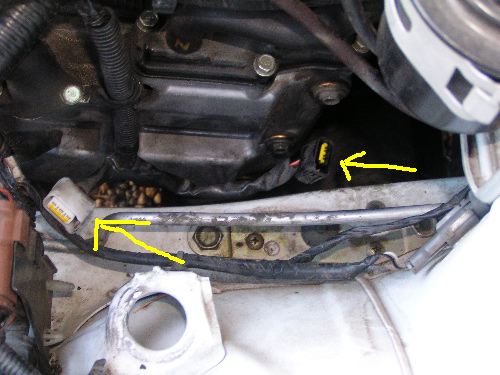
Next the coil packets themselves, 12mm (use the flex head socket). After the bolts are loosened, gently pull on the coil packs to get them off of the spark plugs:
Here's what the coil packs look like:
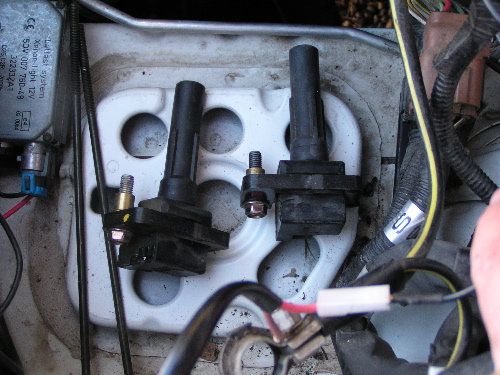
Your now ready remove the spark plugs. Use the spark plug socket on a extension, gently put it into the "hole" until you firmly have the spark plug on the socket. Using a ratchet remove the spark plug- shouldn't be in there too tight.
We can now put your properly gapped new spark plugs in. Use the flex spark plug socket and a extension. You may want to put a light coating of anti-seize on the threads. Gently start the plug in using just the extension, tighten firmly by hand. You'll then put a ratchet on the extension and tighten to 15 ft lbs- you likely won't be able to get a torque wrench in there, so tighten carefully -15 ft lbs is not that much.
Next the coil packs go back on. Slide the boot portion over the spark plug, gently snugging it on- you'll feel it going on. Once properly on, tighten the coil pack bolt to 12 ft lbs- again a torque wrench won't likely fit so go careful- 12 ft lbs is not that much. Next reconnect the connectors to the coil packs.
We're ready to move to the other side:
First remove the air scoop, two 10mm bolts:
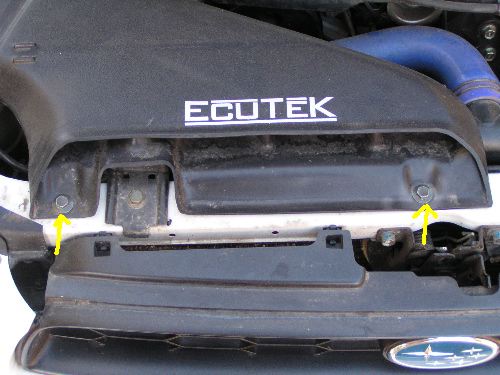
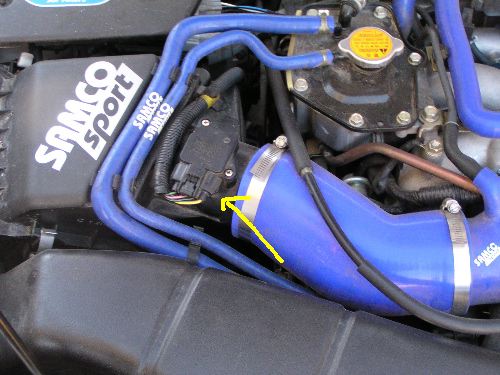
Next we'll remove the airbox. We'll disconnect the hose connecting the airbox to the turbo inlet hose. Then we'll disconnect the connector to the MAF sensor (see pic). Then we'll remove the upper half of the air filter w/ the filter.
Next we'll remove the lower portion of the air box, two 12mm bolts- one
shown in pic, the other on the other side:
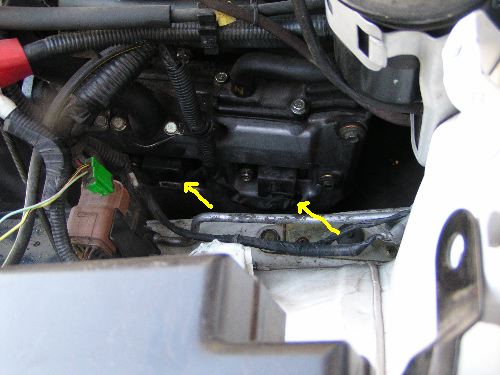
With everything out of the way, we'll now have access to the passenger side coil packs - they come out the same way as before:

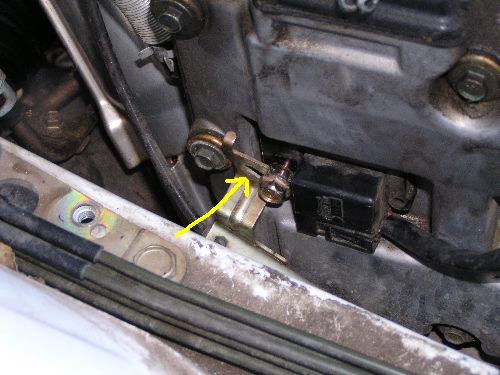
The only difference on this side is there is a bracket that is attached
to the coil pack closest to the fire wall- simply remove it (make sure
to reinstall when putting the coilpack together).
Reinstall all the pieces you have removed. Hooking up the battery last.
Check your spark plugs for unusual color- lot's of good sites explaining the different colors and conditions, like this one: http://www.verrill.com/moto/sellingguide/sparkplugs/plugcolorchart.htm
You have effectively reset your ECU by disconnecting your battery, which means the Advanced Multiplier (AM) is set back to 8, you want it to get to 16. You can do this quickly by gently driving (no boost) until you have a place you can get into 3rd gear- accelerate slowly, left foot braking (puts load on) keep boost at ~ 2-3 psi for ~ 20-30 secs and it should be there. Of course if you have a Delta Dash, you can tell for sure.